
Automatic Sugar Cane Farm in Minecraft: Step-by-step Guide
A step-by-step guide to building an automatic sugar cane farm in Minecraft Java Edition. Piston scheme, collection system comparison, and…
Growing sugar cane manually requires constant attention and regular harvesting. An automatic farm solves this problem using pistons and observers that automatically cut mature stems and send them to the storage system. Such a structure works autonomously and can be scaled to the player's needs — from a single block to large industrial complexes. This guide describes the process of building a modular farm adapted for Java Edition 1.21.11.
Preparation
To build a basic automatic farm module for 10 plants, prepare the following resources:
Resource | Quantity | Note |
|---|---|---|
Sugar Cane | 10 | To plant on the farm blocks |
Mud (or Sand/Dirt) | 10 | Blocks on which the cane is planted |
Water Bucket | 10 | To create a water source near each planting block |
Piston | 10 | Regular pistons to cut the second level of cane |
Observer | 10 | To detect the third level of cane growth |
Redstone Dust | 10 | To transmit the signal from the observer to the piston |
Hopper | 2 | To transport items into the chest |
Chest | 2 | To collect the harvested crops |
Minecart with Hopper | 1 | Required only for dirt or sand beds |
Powered Rail | 4 | Needed to accelerate the minecart under the farm |
Rail | 8 | For moving the hopper minecart |
Block of Redstone | 2 | To power the powered rails |
Building blocks | 2 stacks | Stone, cobblestone, or bricks for the frame and walls |
Glass | 1 stack | Protects crops from falling outside the collection area |
Step 1. Water supply and planting
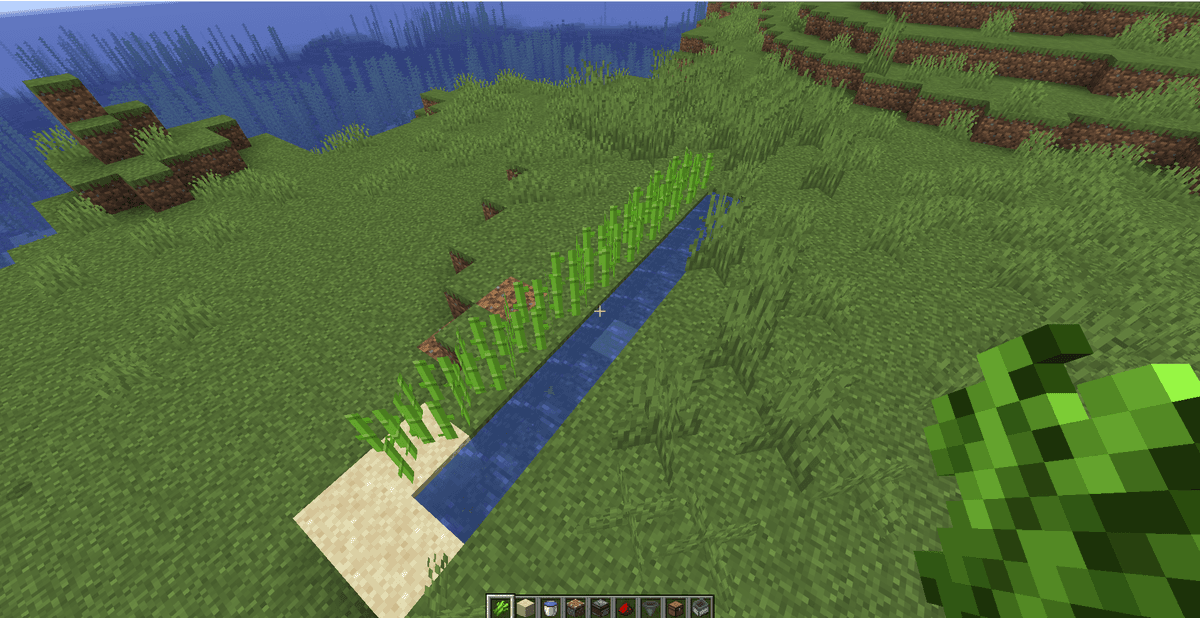
Dig a trench 10 blocks long and fill it with water so that each block is a source or a stable flow.
Parallel to the water trench, place a row of 10 Mud blocks (or Dirt or Sand) for the farm bed.
Plant the Sugar Cane on each farm block right next to the water. Cane will not grow if the farm block is not horizontally adjacent to water.
Step 2. Frame construction and mechanisms
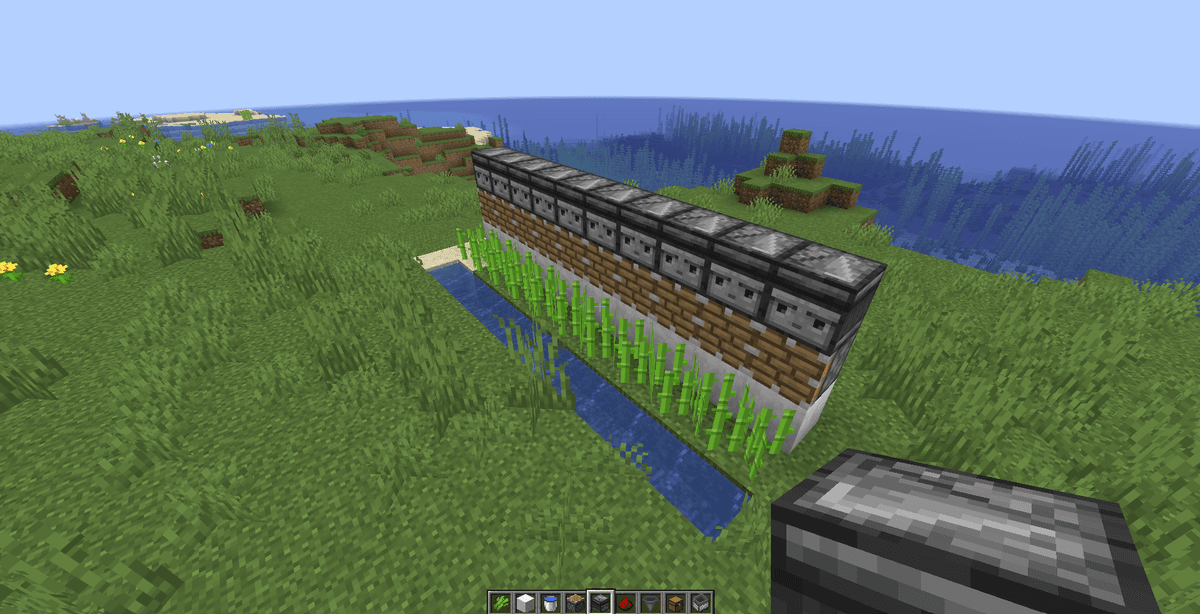
Behind the planted sugar cane, build a wall of solid building blocks one block high (directly above the water line).
Install 10 regular Pistons on this wall so their moving parts face the cane. They should be at the height of the second block of the future cane stem.
Place an Observer on top of each piston. The red observer indicator must face back, and the sensor face should point towards the third block of the cane's height.
Step 3. Redstone signal connection
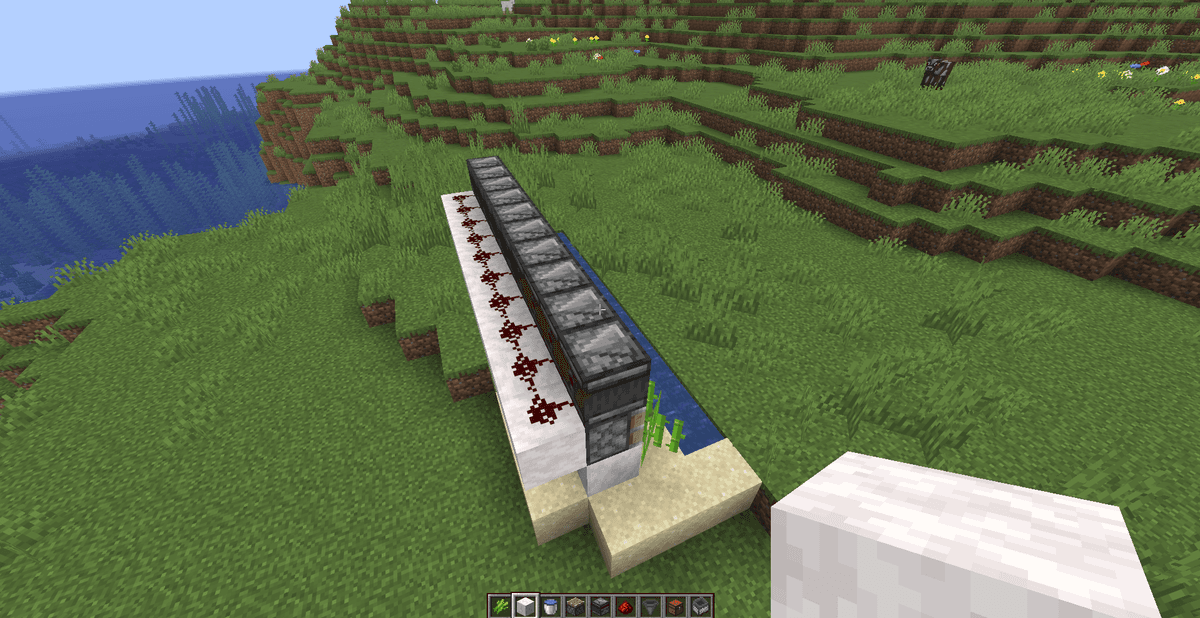
Behind the pistons, directly below the observers, place a row of 10 solid building blocks.
Place one piece of Redstone Dust on each of these blocks. Redstone will link all observers and pistons into a single chain.
Make sure that when the block in front of any observer changes state (for example, placing a stone block at height 3), the corresponding piston below it activates.
Step 4. Collection system setup
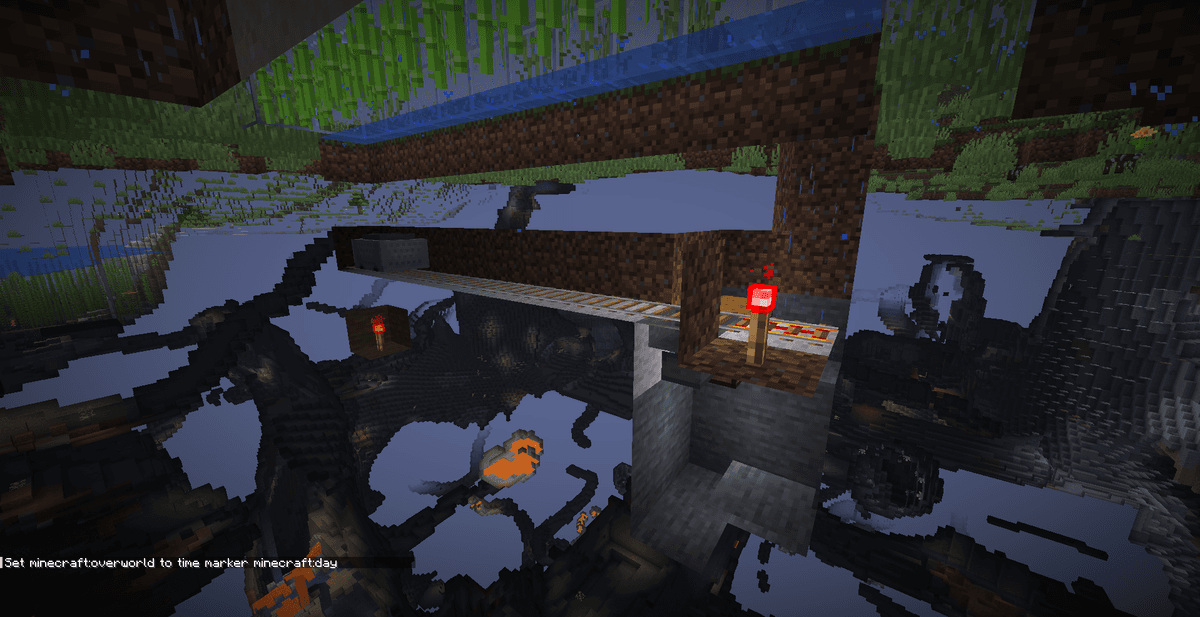
If Mud blocks are used for the planting bed, place 10 Hoppers directly under them. The hoppers must be connected to each other in a chain leading to a double Chest at the start of the farm.
If the bed is built of Dirt or Sand, dig a 2-block high tunnel underneath it. Install rails, placing Powered Rails with Blocks of Redstone at the ends for power, and start the Minecart with Hopper. The minecart should travel under all the farm blocks and unload into a hopper connected to the chest.
Be sure to close the front and sides of the farm with Glass. This will prevent the cut cane from flying out of the farm bounds and being washed past the collection system.
Technical details and growth mechanics
Sugar cane grows due to the game's random ticks. Each random tick has a chance to increase the age parameter of the bottom cane block. This parameter varies from 0 to 15. When the age reaches 15, the game creates a new cane block on top, and the counter resets. Natural cane growth is limited to a height of 3 blocks.
Unlike most crops in the game, sugar cane does not require light to grow. It can successfully develop in total darkness with a light level of 0. The main condition is the presence of water directly next to the block it is planted on.
The parameters for growing cane on different soil types are shown in the table:
Bed block type | Growth speed | Collection feature |
|---|---|---|
Sand | Base (18 min per block) | Requires a minecart with hopper under the block |
Dirt | Base (18 min per block) | Requires a minecart with hopper under the block |
Grass Block | Base (18 min per block) | Requires a minecart with hopper under the block |
Mud | Base (18 min per block) | Allows item collection with a regular hopper |
Advanced variants and collection optimization
For large bases, the classic scheme with pistons and observers for each plant becomes too expensive due to high quartz costs. An alternative for large scales is to use flying machines based on slime blocks, honey, and observers. The flying machine moves back and forth along a large bed up to 100 blocks long, cutting all the cane at once. The harvest falls into the water or on blocks, from where it is washed by the current to a single collection point.
A comparison of different approaches to automating cane collection is shown in the table:
Approach | Build difficulty | Resource cost | Efficiency | Limitations |
|---|---|---|---|---|
Modular (piston + observer) | Low | High (quartz, redstone) | Maximum (instant cutting) | High cost when expanding |
Flying machine | High | Low (slime, a few pistons) | High (cut in one pass) | May get stuck on chunk borders |
Common mistakes and how to avoid them
A mistake in placing the observer at the level of the second block leads to infinite piston activation. If you place the observer at a height of 2 blocks, it activates the piston immediately after the second cane block appears. The piston will cut the cane, triggering the observer again with its action, which loops the mechanism. The observer must be located at the level of 3 blocks.
Using sticky pistons instead of regular ones will block cane growth. A sticky piston will push out and leave the block in front of it when activated, which will prevent cane growth and break the scheme. Use only regular pistons.
The hopper minecart getting stuck happens if the railway length exceeds 30 blocks or if the minecart stops at the junction of loaded chunks. It is worth limiting the minecart path length to 15-20 blocks per module.
Water freezing in snow biomes or at high altitudes stops cane growth. If you build a farm in a snow biome, the water will turn into ice, making cane growth impossible. To prevent this, install light blocks (glowstone or lanterns) above the water.
Leave a comment
Links will be stripped
No comments yet. Be the first to share your thoughts.