Efficient Farming and Automatic Crop Harvesting — A Guide for Mainecraft
Efficient Farming and Automatic Crop Harvesting — A Guide for Mainecraft A farm turns from a chore into a steady source of bread, sugar…
Efficient Farming and Automatic Crop Harvesting — A Guide for Mainecraft
A farm turns from a chore into a steady source of bread, sugar, and emeralds once you understand exactly how a plant calculates its chances to grow. This guide is about the specific numbers that affect speed and about working auto-harvesting setups that work in the current version of the game without mods or command blocks.
Preparation
Hoe — any material; speed only affects how fast blocks break.
Bucket of water.
Wheat seeds, carrots, potatoes, beetroot, pumpkin/melon seeds — whatever you need.
Observers, pistons, and sticky pistons separately.
Redstone dust, hoppers, a chest, redstone repeaters, a comparator.
Bone meal — to speed up the first cycles.
A light source with a level of 9+: torches, lanterns, glowstone, sea lanterns.
Step 1. How a crop actually grows
Growth happens through random ticks — a random update of the block. By default randomTickSpeed = 3, and each 16×16×16 section gets 3 random updates per tick. A specific crop ticks on average once every ~68 seconds.
On each tick, the crop has a chance to advance to the next stage. It is calculated using points:
Condition | Points |
The farmland block the crop is planted on | 2 (dry) / 4 (hydrated) |
Each of the 8 adjacent farmland blocks | 0.25 (dry) / 0.75 (hydrated) |
The same crop diagonally or in a cross pattern | points are divided by 2 |
Probability of growth = 1 / (floor(25 / points) + 1). On a fully hydrated field with rows, the chance is — 1/3 per tick. Most crops (4/5) mature in about 31 minutes of real time.
Light — at least level 9 above the crop block. Less than that — growth stalls; in complete darkness (0) the plant pops off as an item. Sunlight — 15.
⚠️ In 26.1, the standard F3 no longer shows the Client Light line by default — Mojang trimmed down the debug screen. To turn it back on: press F3+F6 and, in the settings menu, switch Client Light from OFF to In Overlay. Below the Facing: line, Client Light: X (Y sky, Z block) will appear, where the first number is the final level, followed by sky and block separately. An alternative is F3+4: a new lightmap renderer that shows a texture in the bottom-right corner (vertical — sky 0–15, horizontal — block 0–15). No number, but you can see the gradient.
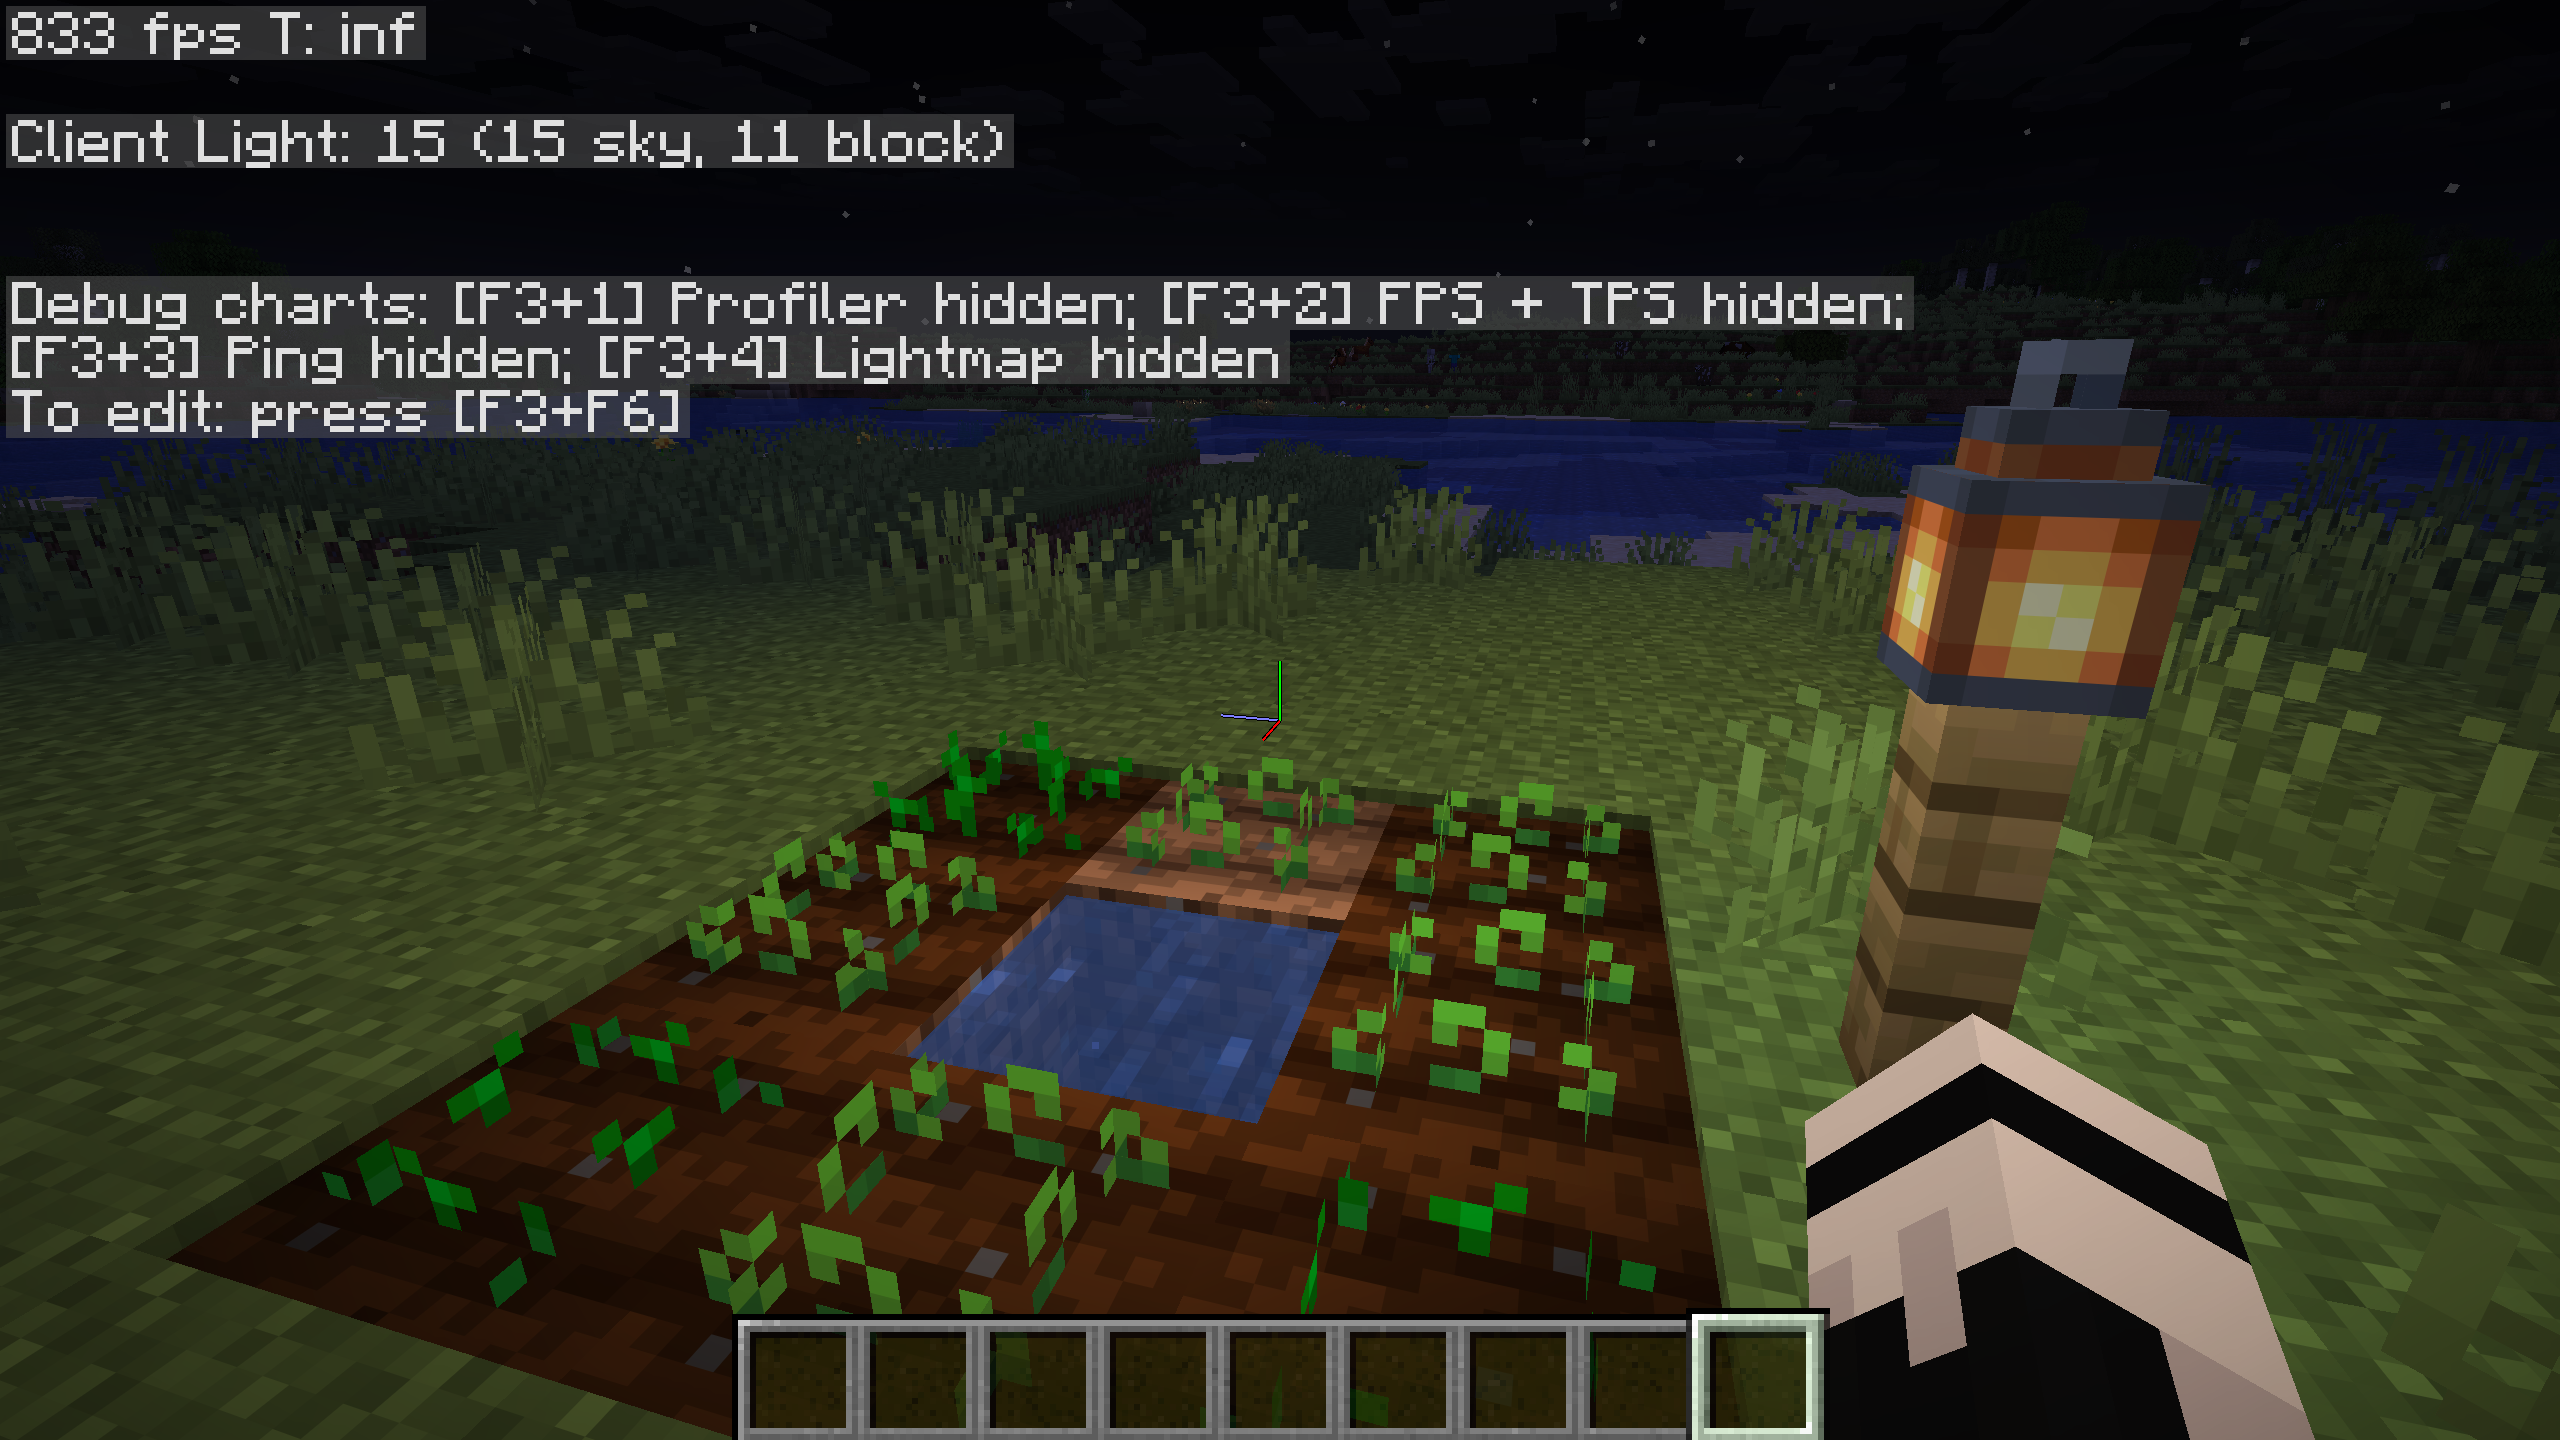
alt: F3 screen with Client Light enabled on a crop under a lantern at night
Step 2. Planting in rows instead of solid
If you plant a field solidly with a single type of crop, every plant will have a neighbor diagonally — the points get halved and growth goes twice as slow. That is why a solid field grows longer than a field with rows.
The standard is 9×9 with a water block in the center:
One water block irrigates 4 blocks in each horizontal direction.
The water must be at ground level or higher — otherwise it does not hydrate.
Between rows of the same crop, insert either empty soil or another crop. Alternating wheat → carrot → wheat → carrot works without any penalty.
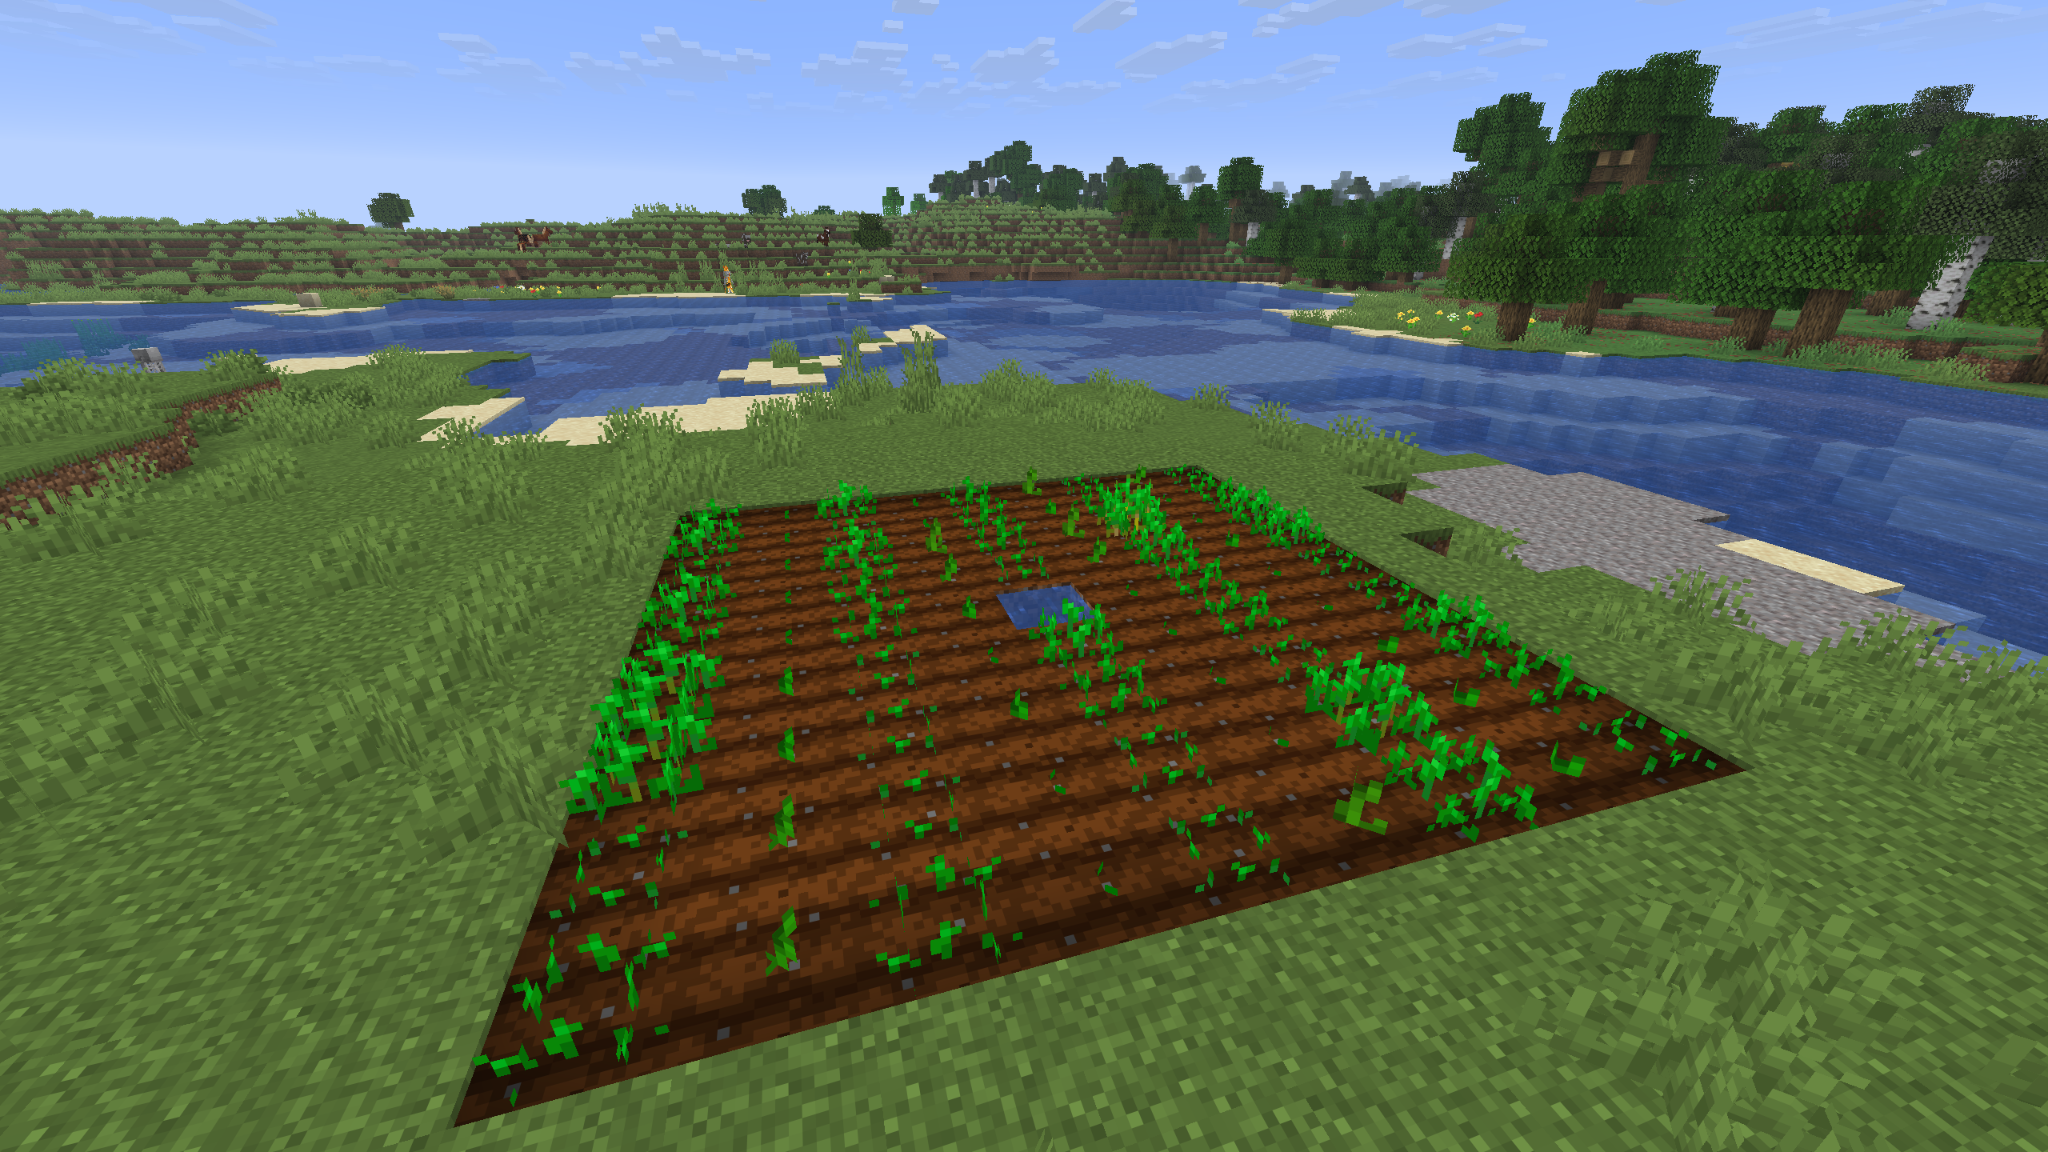
alt: a 9×9 field with water in the center and alternating rows of wheat and carrots
Step 3. Auto-harvesting stalk crops (wheat, carrots, potatoes, beetroot)
This setup uses villagers for full automation, which removes the need to replant crops by hand. Instead of water, the mechanic of "sharing" between mobs works here.
The classic setup (Full automation):
Field layout: Build a 9×9 block square (or four such sections, as in the screenshot). In the center of each square — a water source, above which sits a composter (a workstation) and a light source.
Collection point: In the very center of the whole structure, dig a pit. Place a chest there and connect hoppers to it (the hoppers should be under rails with a hopper minecart — it picks up items faster).
Receiver (the "Standard" villager): In the center, above the collection system, lock one villager in a cage made of fence gates. Important: it must not have access to the plots and must not have food in its inventory.
Farmer workers: Release one villager into each section with plots. When their inventory fills up with the harvest, they will come up to the central villager to "share" food.
Intercepting the drop: When a farmer throws the harvest to the central villager, the hopper minecart intercepts the items while they are still in flight and sends them to the chest.
This is a fully automatic farm: the villagers plant on their own, harvest on their own, and store the harvest in your chests on their own. All that is left for you is to collect the finished product.
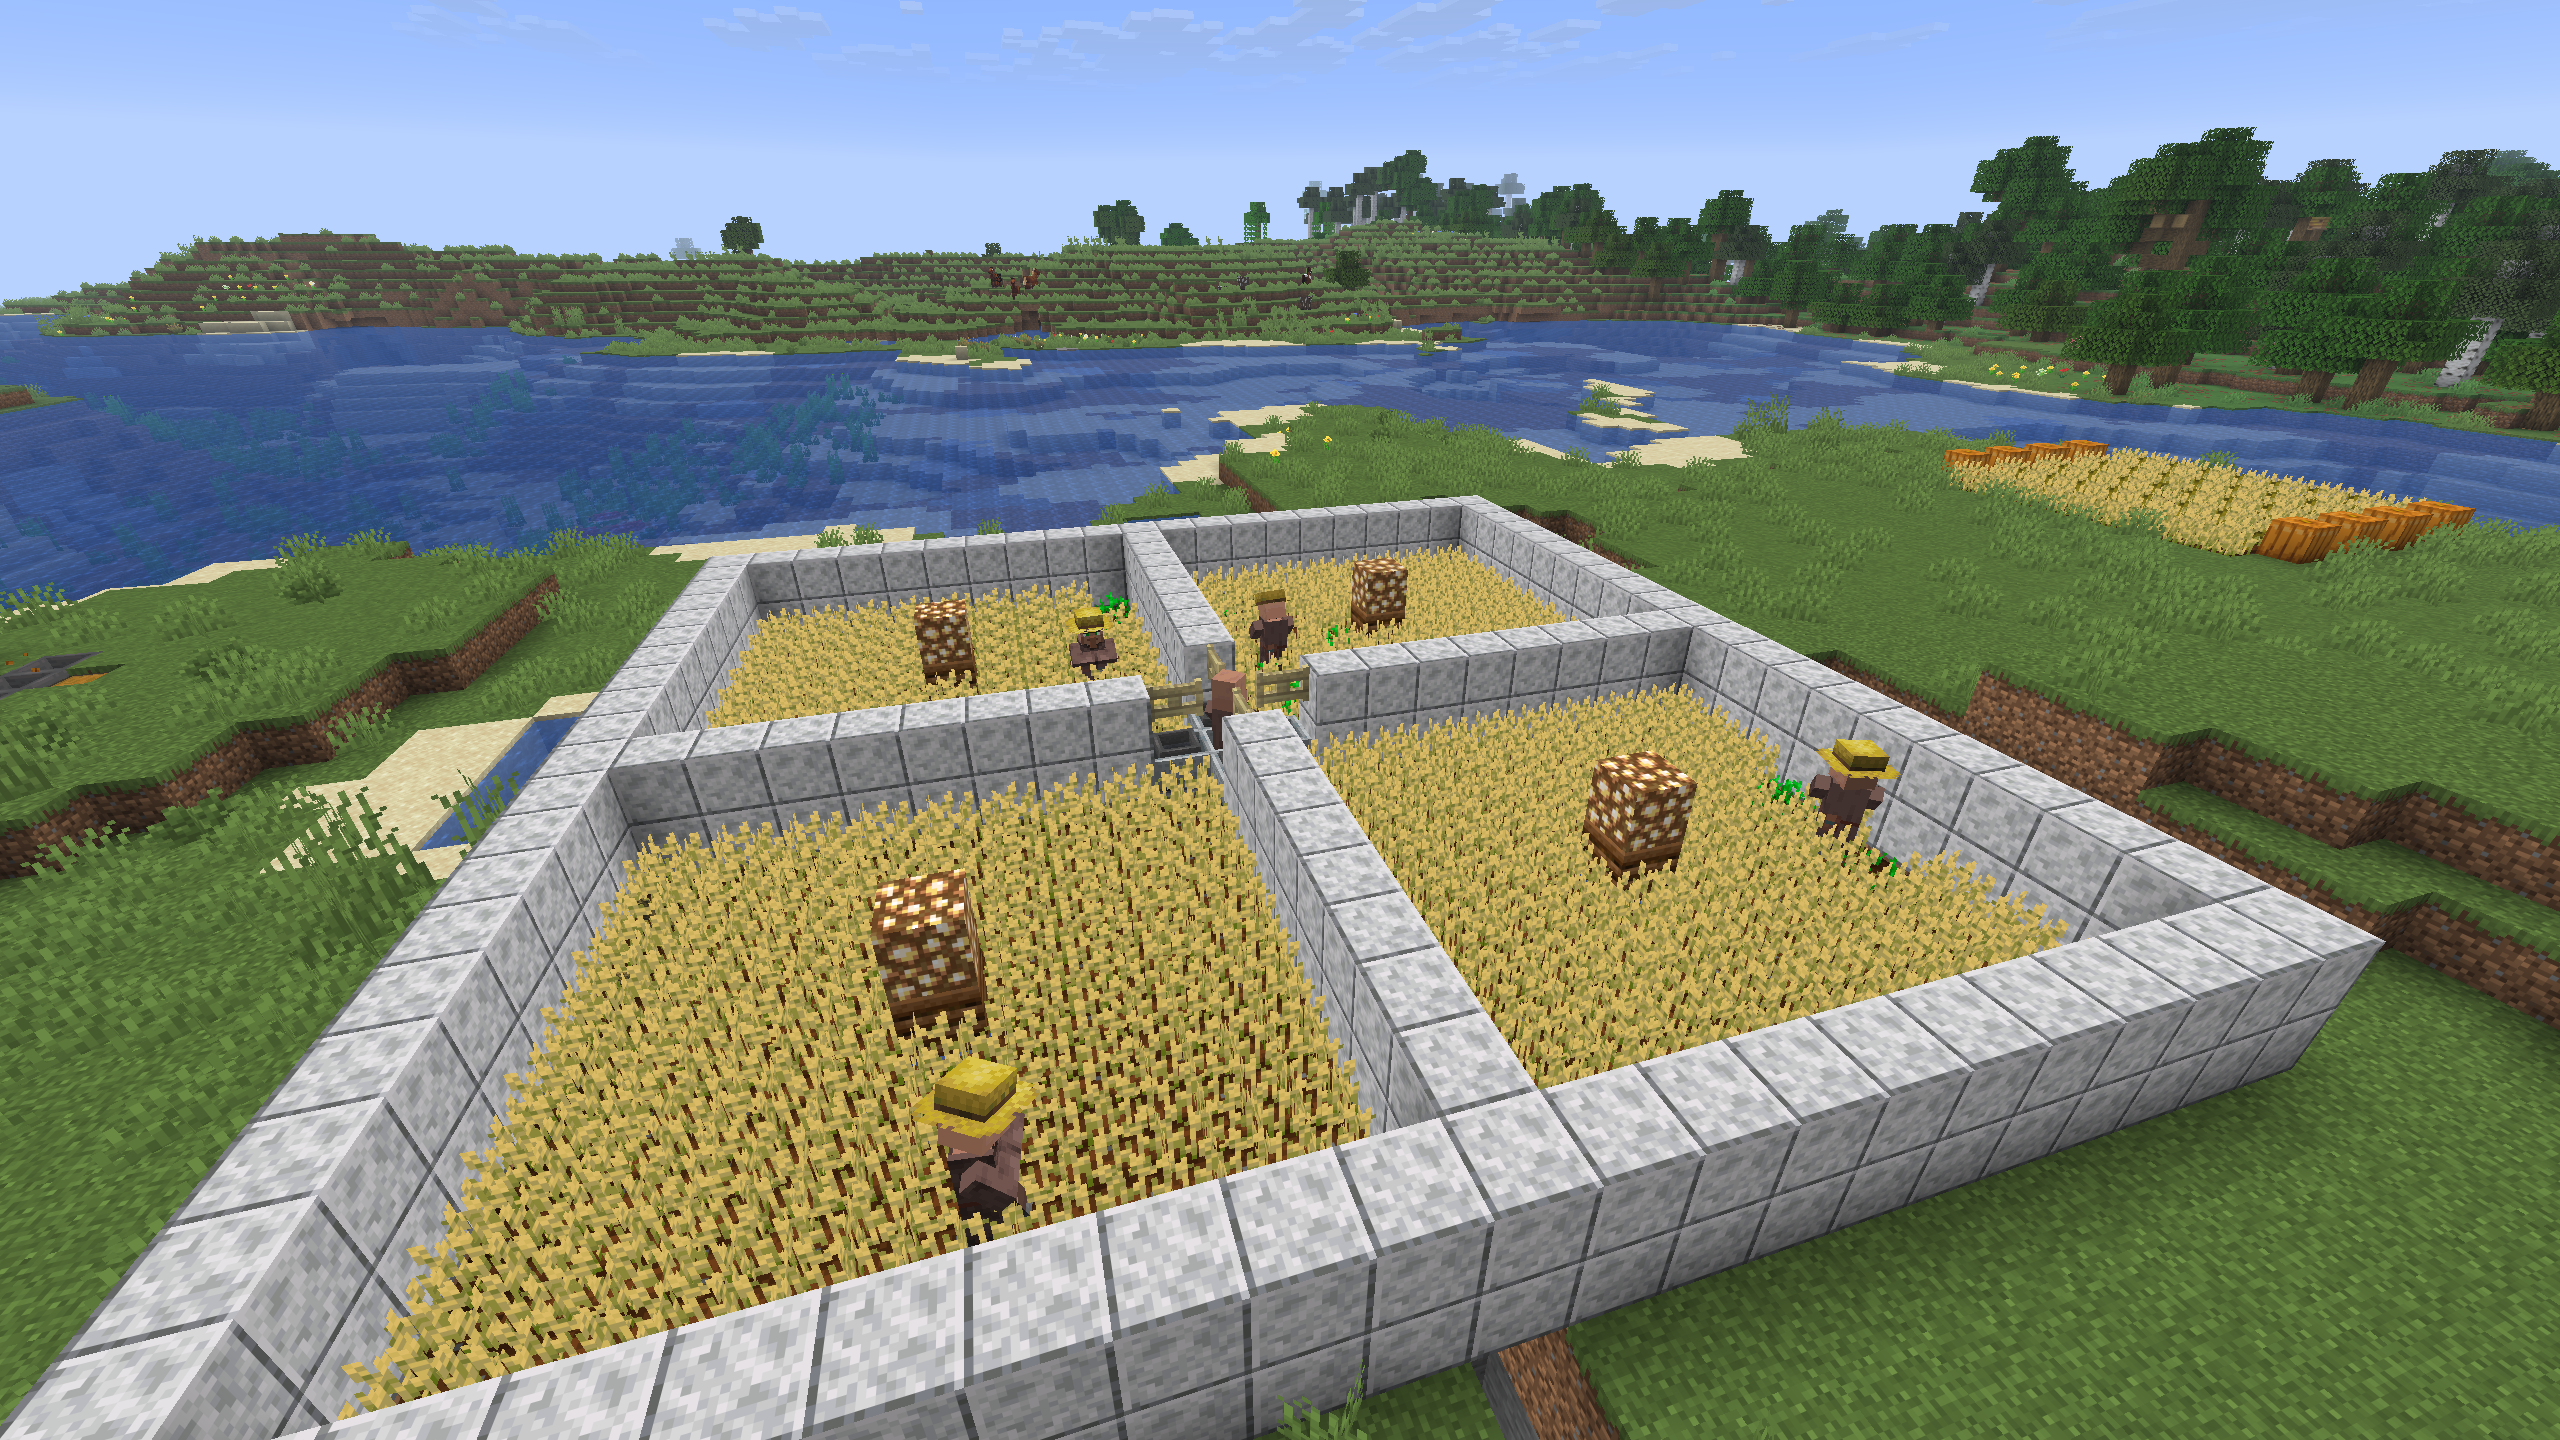
alt: a farm with villagers for auto-harvesting
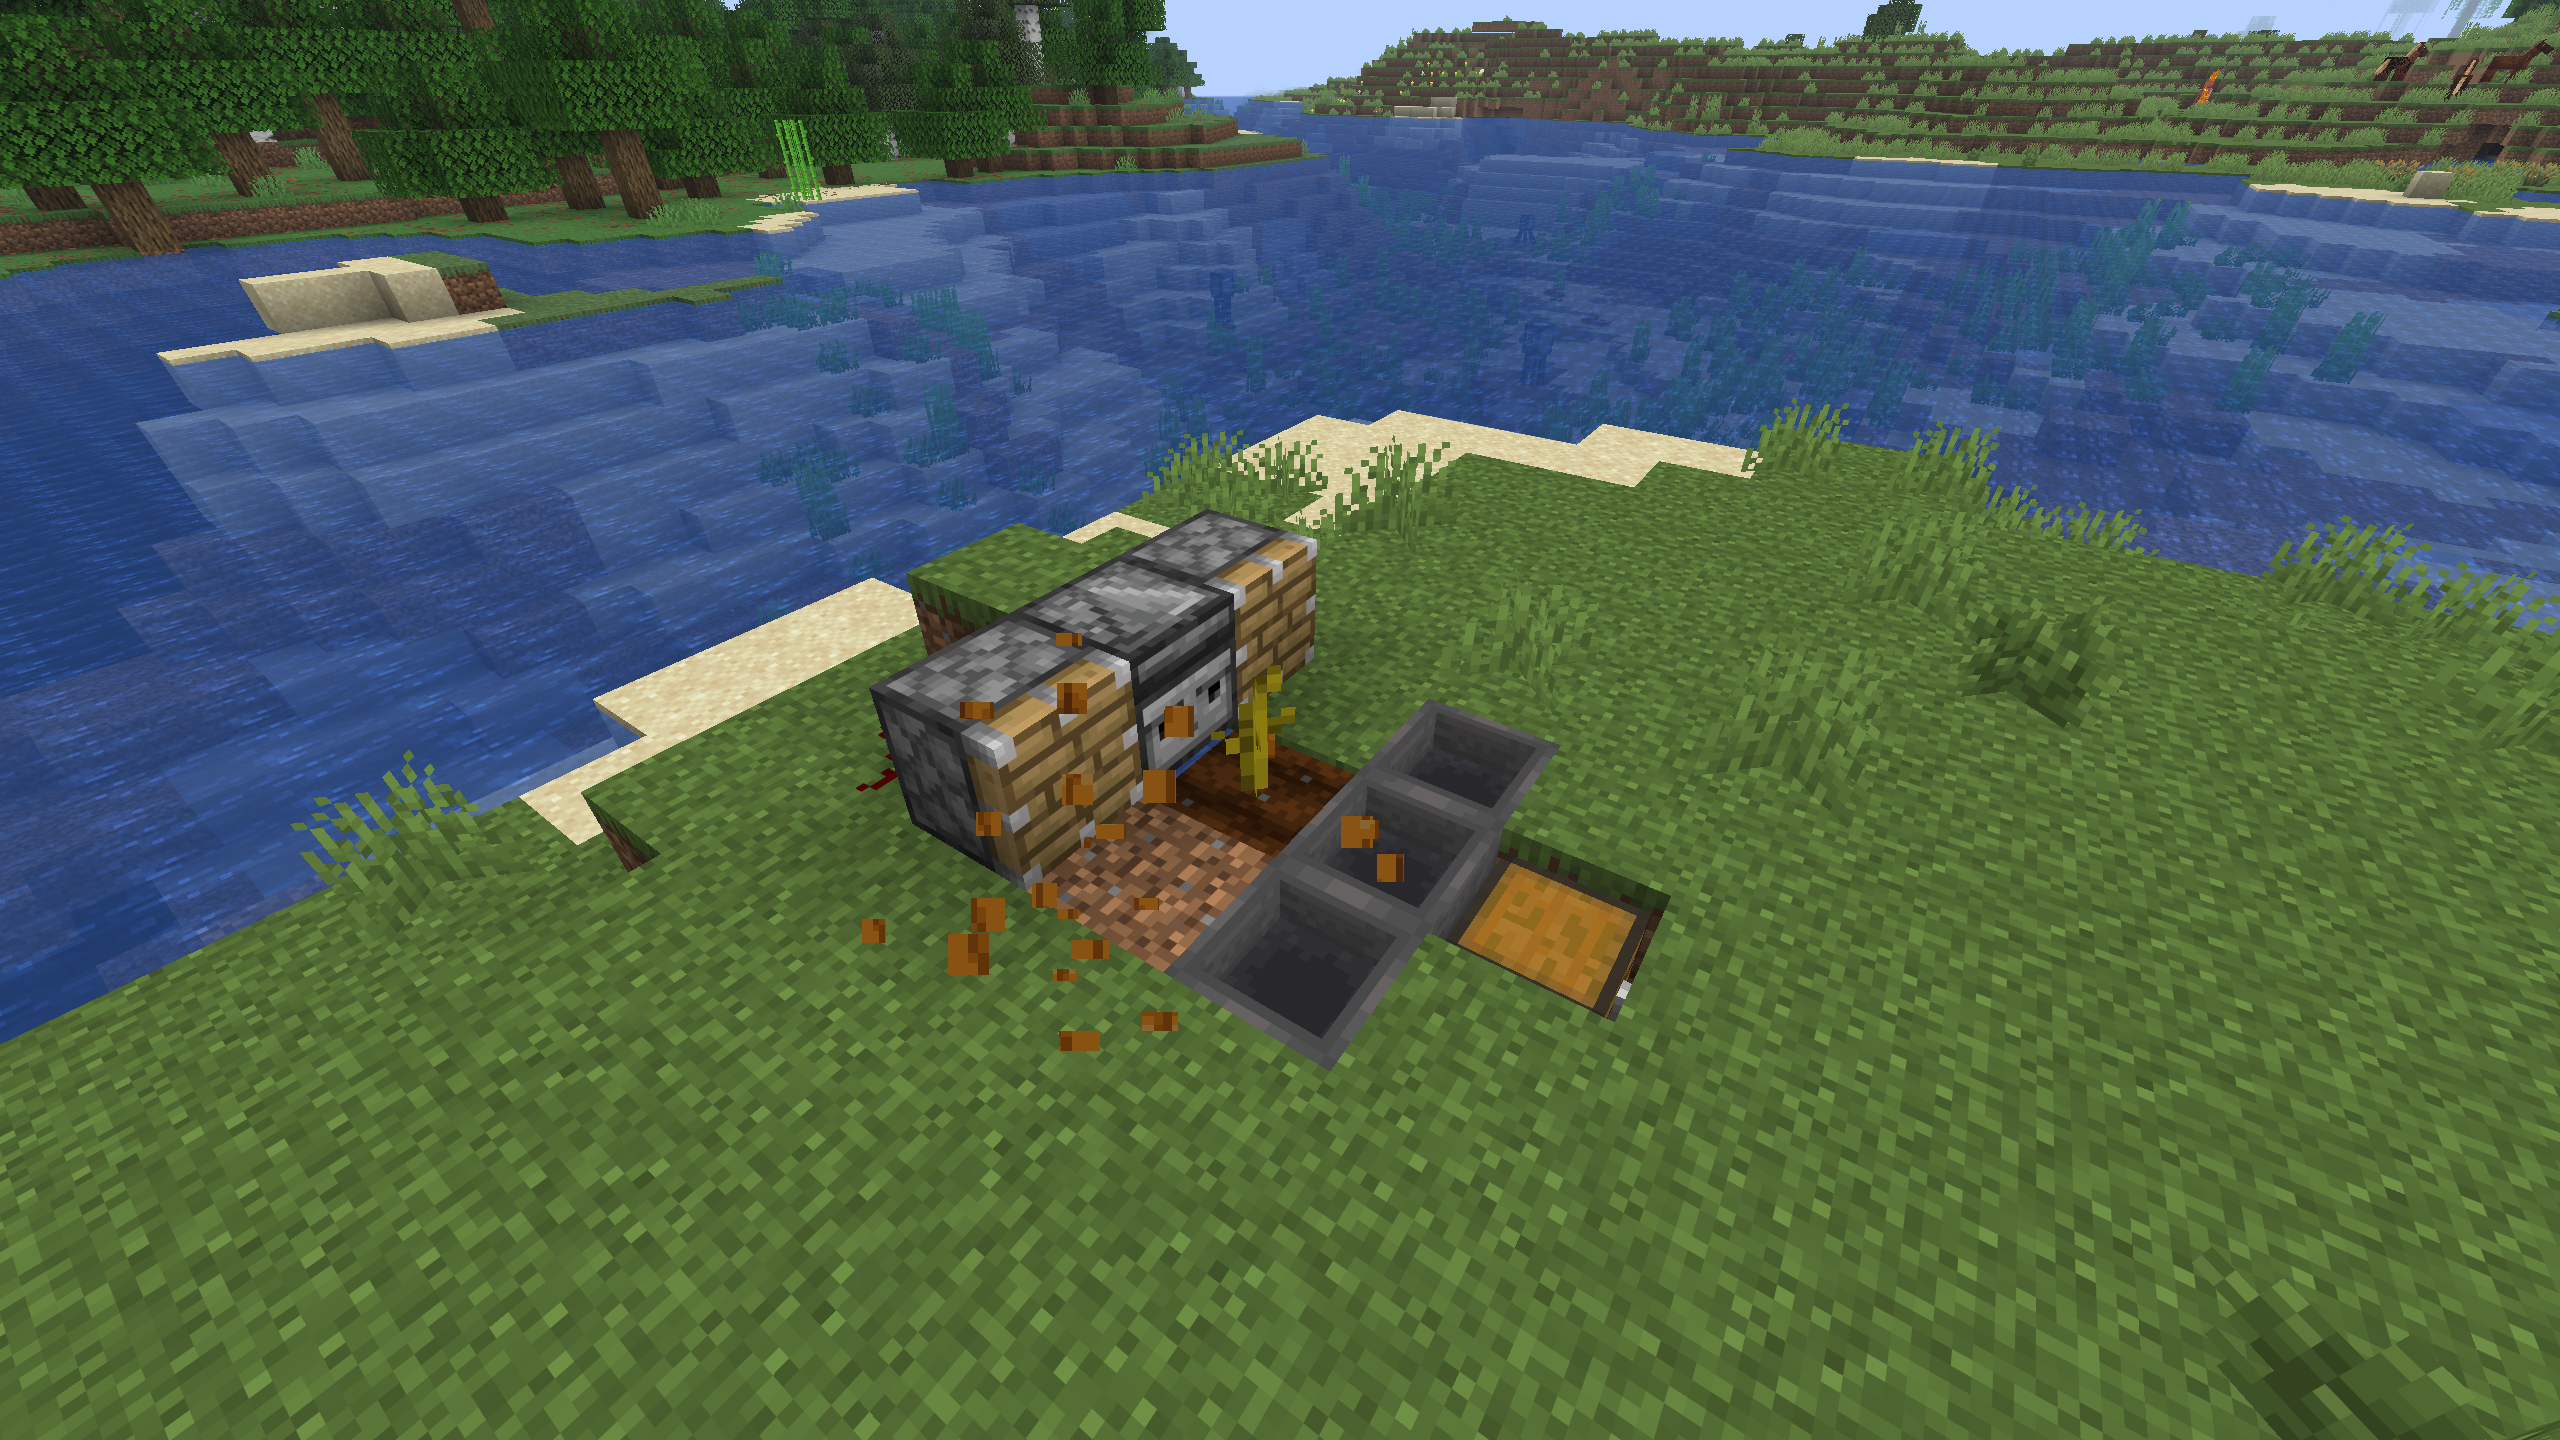
Step 4. Pumpkins, melons, sugar cane, bamboo
Here the mechanic is different — the fruit grows as a separate block next to the stem (pumpkin/melon) or the plant itself grows upward (sugar cane/bamboo). That is why it is harvested not by water, but by a piston.
Pumpkin/melon. The stem — on a hydrated farmland block. Next to it — an empty soil block where the fruit will grow. Beside this block — a piston, beside the piston — an Observer aimed at the fruit. The pumpkin/melon appears → the Observer detects the change → the piston pushes the block into a water channel or directly into a hopper.
alt: a pumpkin farm with pistons
Sugar cane. It must be planted on sand or a soil block next to water. At the height of the third block — an observer aimed at the sugar cane, below it — a piston. The sugar cane grows up to 3 blocks tall → the Observer sees the new block → the piston breaks it. The bottom 1 block stays, and the sugar cane grows again from the first. The loot falls into the water channel below or into a hopper.
Bamboo. The same as sugar cane, but no water is needed. It can be placed next to a sugar cane farm.
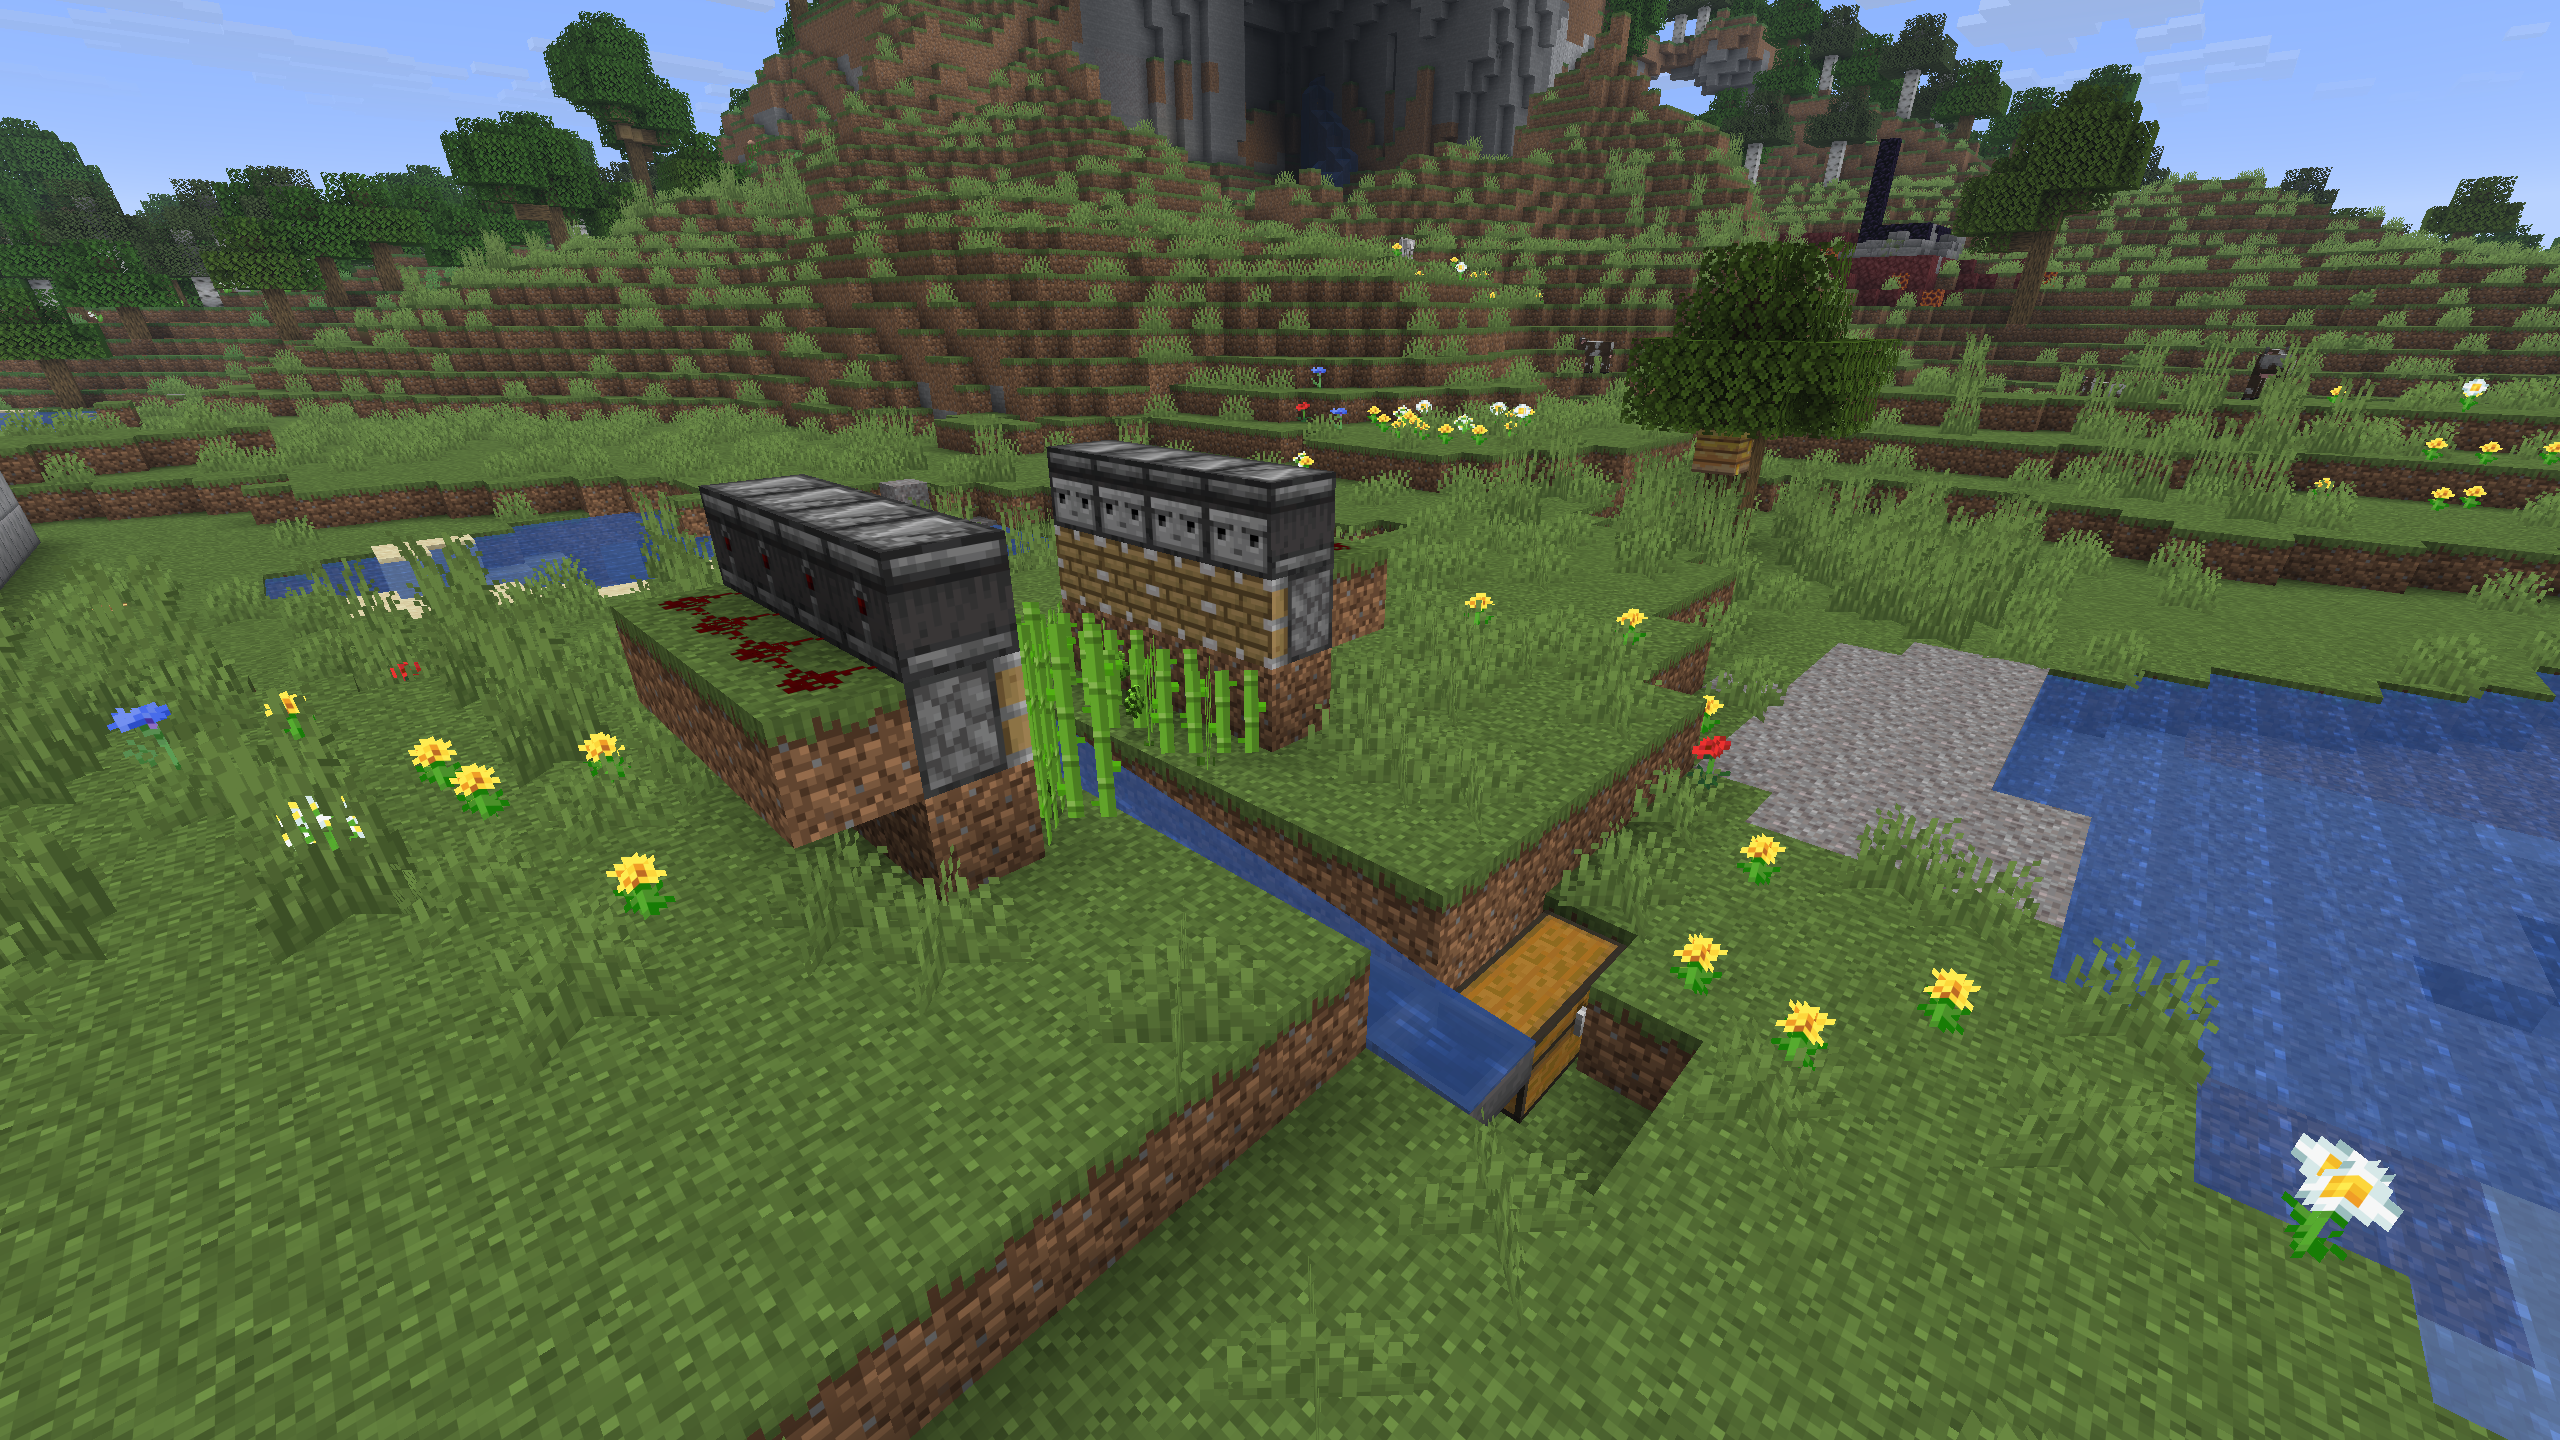
alt: a sugar cane farm with pistons and observers
Alternatives and variations
Bone meal via a dispenser. A dispenser with bone meal aimed at the crop, + an automatic source of bones (a skeleton generator in an AFK farm hall). The growth cycle is seconds, but it requires hundreds of stacks of bone meal.
Bees as an accelerator. A beehive with 3 bees next to the field and a flowerbed with 4–5 flowers. The bees carry pollen and randomly drip it onto the crops — each drop = +1 growth stage. Passively, without redstone.
/gamerule randomTickSpeed 30. The field grows 10 times faster. Suitable for a private world; on a server it strains the ticks and causes lag.
Conclusion
For mass trading with a farmer villager — full automation through the farmer. Two or three such farms next to each other yield hundreds of emeralds over an evening.
Bamboo and sugar cane are a separate farm, because the mechanic is vertical. Combining them with grain crops in a single structure is not advisable.
The common limitation of all vanilla farms is that the chunk must be within the simulation range. If you are far away, it is better to set an AFK point near the main farm, or to move the base so that the farm stays within the radius.
No comments yet. Be the first to share your thoughts.