
How to build a trading hall and villager farm in Minecraft
A complete guide to building a villager trading hall and farm in Minecraft. Learn about villager professions, breeding, and how to get…
How to build a trading hall and villager farm in Minecraft
A trading hall and villager farm in Minecraft is the basic infrastructure for obtaining emeralds, enchanted books, and resources through trading. Villagers bind to job site blocks, acquire professions, and sell items for emeralds. One properly assembled cell provides a stable source of the desired goods for hundreds of hours of play. Below is the minimum design that can be realistically built in early survival, and an explanation of all the mechanics that determine whether it will work.
How villager trading works
An adult villager without a profession searches for an available job site block within a 48-block radius (Java Edition) — this is a sphere, so vertical distance is also taken into account. In Bedrock Edition, the radius is smaller: 16 blocks horizontally and 4 vertically. When a villager finds a job site block that is not yet occupied by another villager and can reach it, green particles appear — the profession is secured.
There are 13 professions in Minecraft. Each is tied to a specific job site block:
Profession | Job site block | What they sell |
Librarian | Lectern | Enchanted books, lanterns, name tags, compasses, clocks |
Farmer | Composter | Bread, golden carrots, glistering melon slices, cakes |
Cleric | Brewing Stand | Ender pearls, redstone dust, glowstone, bottles o' enchanting |
Cartographer | Cartography Table | Explorer maps, item frames, banners |
Armorer | Blast Furnace | Iron, chainmail, and enchanted diamond armor |
Toolsmith | Smithing Table | Tools, bells |
Weaponsmith | Grindstone | Iron and enchanted diamond weapons, bells |
Fletcher | Fletching Table | Bows, crossbows, arrows |
Fisherman | Barrel | Enchanted fishing rods, fish, boats |
Butcher | Smoker | Cooked meat, rabbit stew, sweet berries |
Shepherd | Loom | Wool, dyes, paintings, beds, shears |
Mason | Stonecutter | Quartz, terracotta, polished stones, bricks |
Leatherworker | Cauldron | Leather armor, horse armor, saddles |
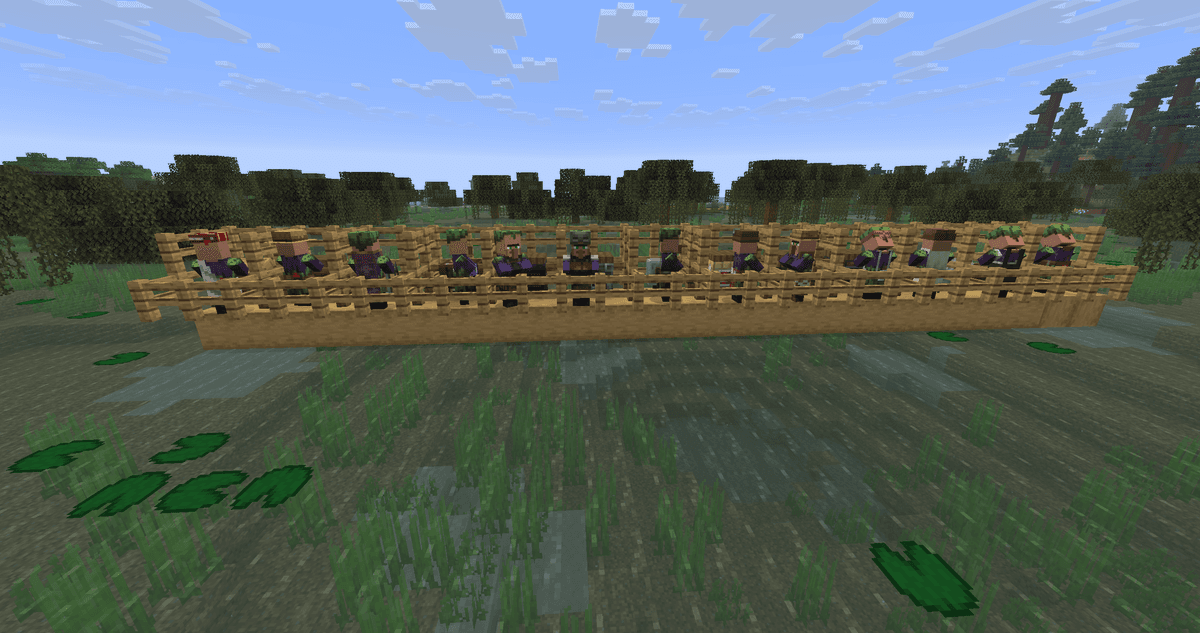
All possible villager professions, gathered together
Each profession has 5 levels: Novice, Apprentice, Journeyman, Expert, Master. The level increases based on the number of trades — after a certain number of trades, the next set of offers is unlocked.
A crucial detail where most halls fail: after the first trade, the villager's profession is fixed forever. Destroying the job site block after this will change nothing — the villager will remain, for example, a Librarian even if the lectern is removed, and will look for another block of the same type. Before the first trade, the profession can be changed as much as you want: you break the block — the villager becomes unemployed, you place a new one — a new profession with a new set of offers is secured.
In Bedrock Edition, a villager needs a bed within the village to restock their goods — without it, trading will end after the first cycle. In Java Edition, a bed is not required to restock: it's enough for the villager to reach their job site block during the working hours of the day. However, a bed is still needed for breeding villagers and for a correct schedule, so it's worth leaving it in the cell.
What you will need to start
For a basic hall of 4–6 villagers, minimal resources are sufficient. Everything is built from materials available early in survival.
Building blocks:
Any solid opaque block for the frame, partitions, and floor — 2 stacks of cobblestone, planks, or stone bricks.
Bed — one for each villager. Color doesn't matter; villagers will take any available one.
Trapdoors or fence gates — to close the front of the cell and trade through it without letting the villager out.
Job site blocks for the desired professions (list in the table above). For a start, a Librarian (Lectern), Farmer (Composter), and Armorer (Blast Furnace) are usually enough.
Tools for moving villagers:
Boat — the easiest way to transport one villager over land. A wooden boat is crafted from 5 planks.
Minecart and rails — for longer distances and moving a villager vertically via powered rails.
Villagers. Two options: find a village and transport from there, or build a villager breeder on site. Let's look at both below.
Basic trading hall cell
The simplest functional cell is a niche 1 block wide and 2 blocks deep, 2 blocks high, with the job site block right in front of the villager. The structure can be assembled in a minute.
Step-by-step guide:
Enclose the niche with opaque blocks on three sides.
Inside, place a bed if needed so the villager can reach it.
Cover the opening on top with a full block so the villager won't jump out and other mobs won't fall in.
Bring the villager into the niche (how — see below) and only after that place the job site block in front of them from the front side, at foot level or on an adjacent block they can reach.
Place a trapdoor or fence gate on the front of the cell — you can trade through them without letting the villager out.
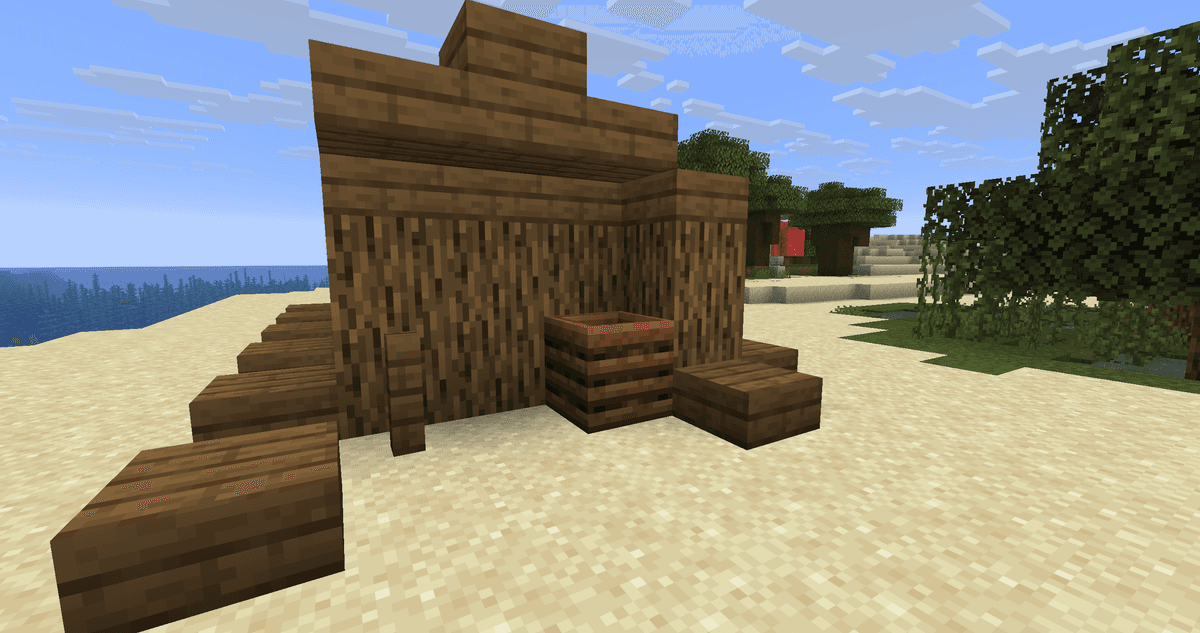
Cross-section of a finished trading cell
Why the job site block is placed last. In Java Edition, binding to a job site block occurs through pathfinding, not line of sight. Glass or a transparent partition does not prevent a villager from claiming someone else's block if there is a physical path to it — the villager "sees" the block through glass and even through a solid wall if they can walk around it. Therefore, when there are multiple cells, there is only one reliable way to avoid confusion: first lock each villager in their niche so they cannot reach adjacent blocks, and only then place a job site block in front of each one in turn. Other villagers will not take an occupied block.
Make the floor under the cells out of a full block, not a slab or trapdoor. Villagers perceive partial blocks as an obstacle to pathfinding; because of this, the profession may be secured, but the restocking of goods may not.
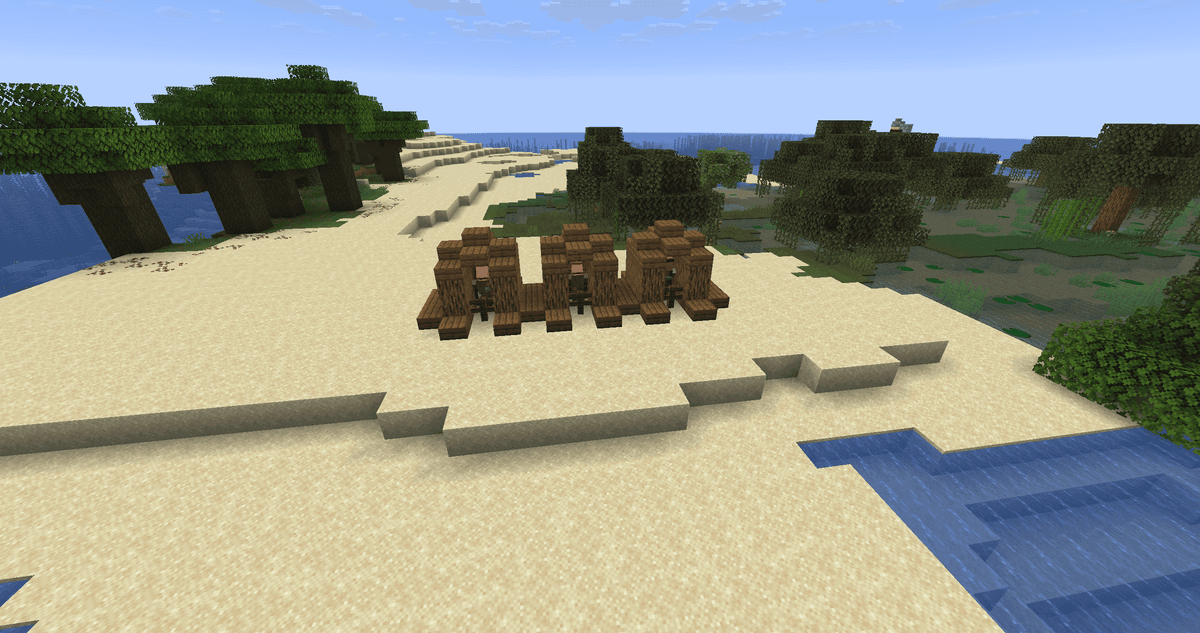
A row of 3 cells, top view
How to transport a villager
A villager will not follow the player on their own and does not react to a lead. There are two working ways to move them: a boat and a minecart.
A boat is the easiest method for short distances. Place a boat right next to the villager while they are walking — usually the villager will get into the seat themselves, sometimes you have to push them from the side. A boat can also be rowed on land: it moves slowly on dry ground, but it moves, and the villager stays inside. It's faster on water.
A minecart is more reliable for long routes and moving upward. Place a rail, put a minecart on it, and guide the villager from above (click on them right over the minecart or trap them in a 1×1 corner where the minecart is). Then push the minecart along the rails, including upwards via powered rails with redstone.
A villager will not leave a boat or minecart on their own until the player destroys the vehicle. This is used to place the villager exactly into the cell: bring them to the spot, place a block over the villager's head, and break the boat — the villager stays in the niche with no chance of escaping. A villager in a boat or minecart can claim a job site block and trade if the block is within reach; other villagers will not take the block claimed by them.
How to lock in a profession and get the desired goods
The set of offers for a newly employed villager is random. The first set of books from a Librarian, for example, is often not what is needed: you might get Power instead of Mending, or Protection instead of Silk Touch. Until the villager makes at least one trade, the set can be reset indefinitely.
The "re-rolling" method:
Click on the villager as if to trade and check all offers. If the set doesn't suit you, don't make any trades.
Close the interface. Break the job site block (e.g., the lectern).
Wait a few seconds — the villager will emit orange particles and become unemployed.
Place a new job site block of the same type in the same spot. The villager will claim it, and a new set of goods will appear.
Repeat until the desired offer appears. It's best to "roll" the job site block during working hours (roughly from morning to noon) — this is when the villager actively claims blocks.
As soon as the desired trade appears, make exactly one trade with this villager — this will lock in both the profession and the set of goods forever. The offers will no longer change with further manipulation of the job site block.
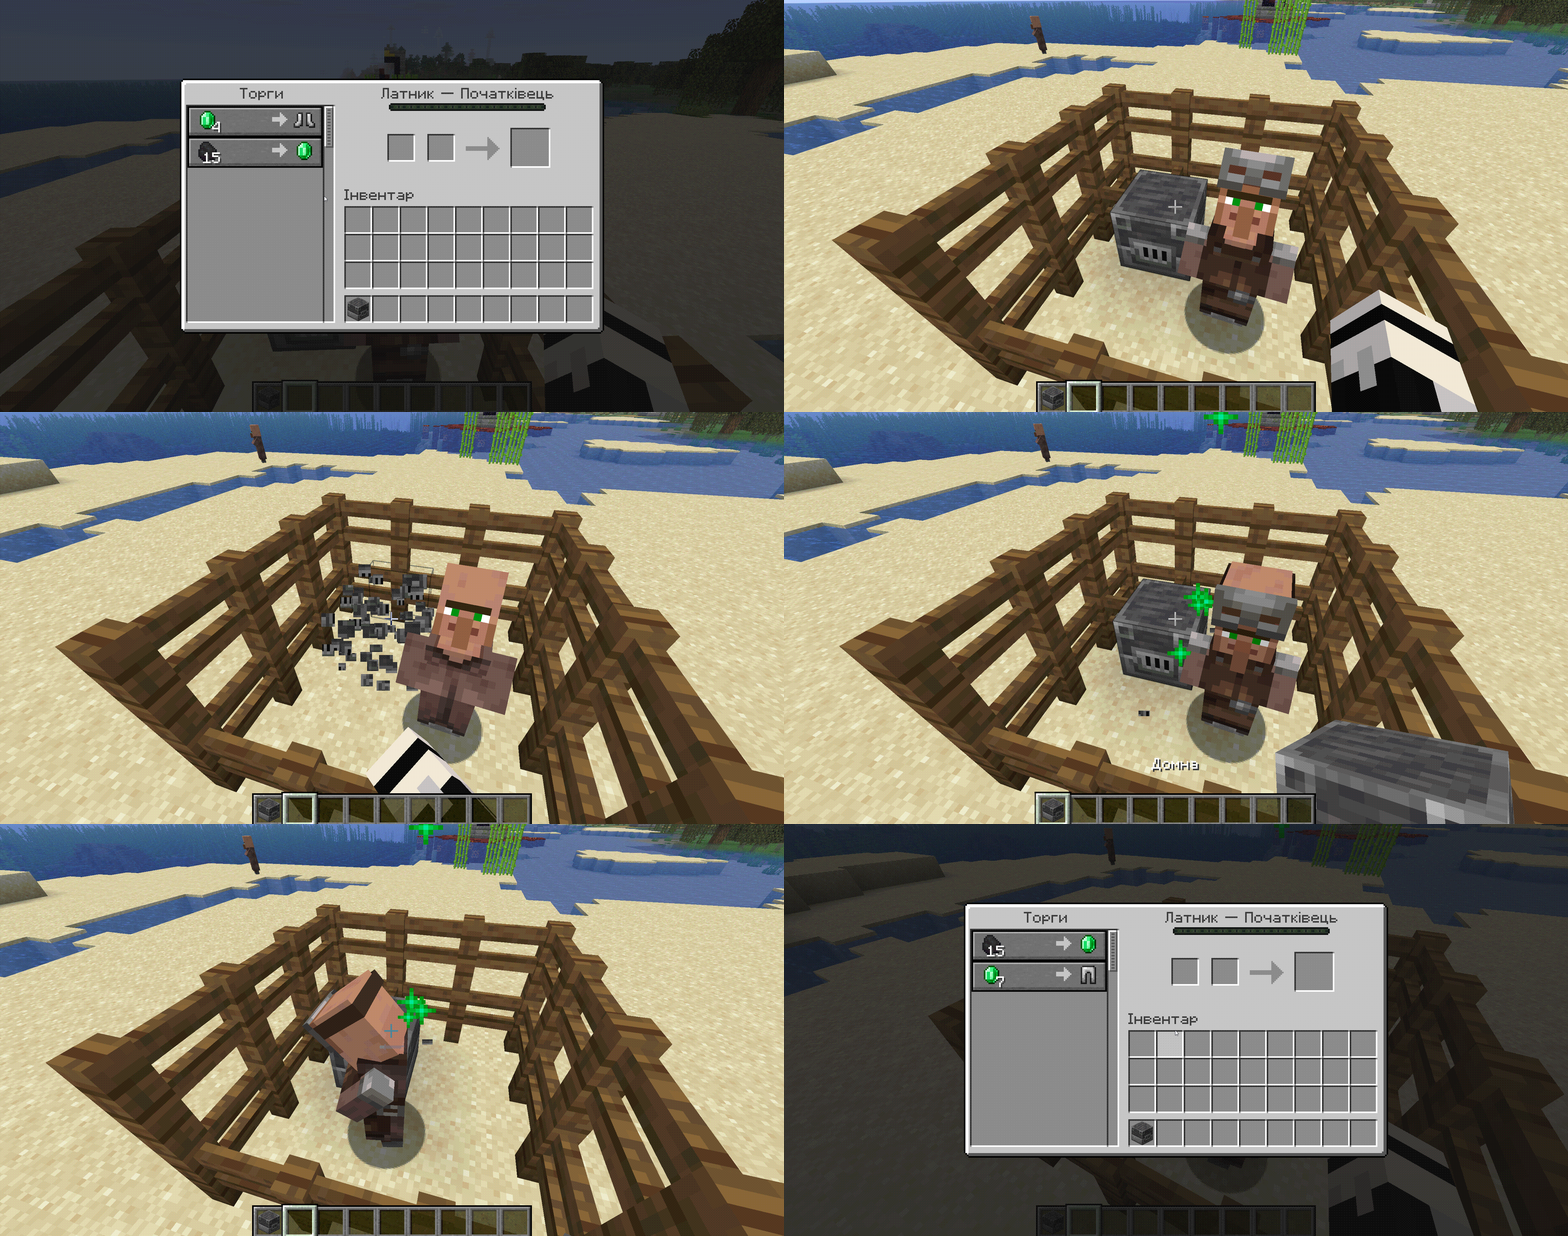
Demonstration of changing a villager's goods
Villager farm: breeding on site
To have a supply of villagers for re-rolling, it's easier to build a breeder than to search for them in a wild village every time.
Breeding conditions:
Two adult villagers in an enclosed space.
An available (unclaimed) bed within the village for the baby — each new villager needs a separate new bed that they can reach. There must be at least 2 empty blocks of space above the bed.
Enough food in the villagers' inventory: 3 loaves of bread, 12 carrots, 12 potatoes, or 12 beetroots in one slot. Bread gives 4 saturation points per item, vegetables — 1 each; a villager needs 12 points to become "willing".
A villager with excess food (usually a Farmer) throws food to others, which is why a Farmer is kept in a standard breeder. They harvest crops, share with their partner, both become willing, and breed.
Minimal breeder for 2 villagers:
Create a room roughly 4×4 with solid blocks, 3 blocks high, with a ceiling.
Leave a strip of farmland in the floor — plant carrots or potatoes.
Place 3 beds inside (two for the parents, one for the child) and a composter to make one villager a Farmer.
Bring two villagers inside (boats are the easiest way).
The Farmer works the field, shares food with their partner, hearts appear over both — a baby is born.
After ~20 minutes of real time, the baby grows into an adult villager without a profession. They are then moved to the trading hall and tied to the desired job site block.
After successfully breeding, villagers cannot breed again for another 5 minutes (6000 ticks). This is a fixed timer and cannot be shortened.
Discounts from curing zombie villagers
Curing a zombie villager provides a permanent discount on all of that villager's trades for the player who cured them. This is the most powerful legal way to make trading cheaper.
How it works:
Find or create a zombie villager. In nature, a zombie villager spawns in place of a regular zombie with a 5% chance (20% in an old growth pine taiga biome). Also, any regular villager killed by a zombie turns into a zombie villager: on Normal difficulty — with a 50% chance, on Hard — 100%.
Brew a Splash Potion of Weakness.
Prepare a regular Golden Apple — 1 apple surrounded by 8 gold ingots. An enchanted one (with a purple gleam) is not suitable for curing.
Trap the zombie villager in a safe spot under a roof where they can't reach you or other villagers. A 1×2 glass cell works well.
Throw the Splash Potion of Weakness at the zombie villager.
Approach and use the Golden Apple on them. Red particles will appear, and the villager will start shaking — the curing has begun.
Wait 3–5 minutes of real time (in Java). Iron bars and beds in a 9×9×9 radius speed up the process slightly. The villager will return to their normal state.
As of update 1.20.2 (September 2023), repeatedly turning the same villager into a zombie and curing them no longer provides additional discounts. The first cure grants the maximum discount — subsequent cycles change nothing. One zombie = one villager = one cure for a permanent discount.
If the villager has never been traded with prior to zombification, they will return as unemployed after curing and may immediately change their profession to the nearest job site block. To preserve a specific set of goods, trade with the villager before they become a zombie.
In Java Edition, only the player who performed the cure receives the discount. On a multiplayer server, everyone cures their own villagers separately. The impact on prices is direct: a Mending book, which costs 10–30 emeralds, drops to about 1 emerald from a cured Librarian.
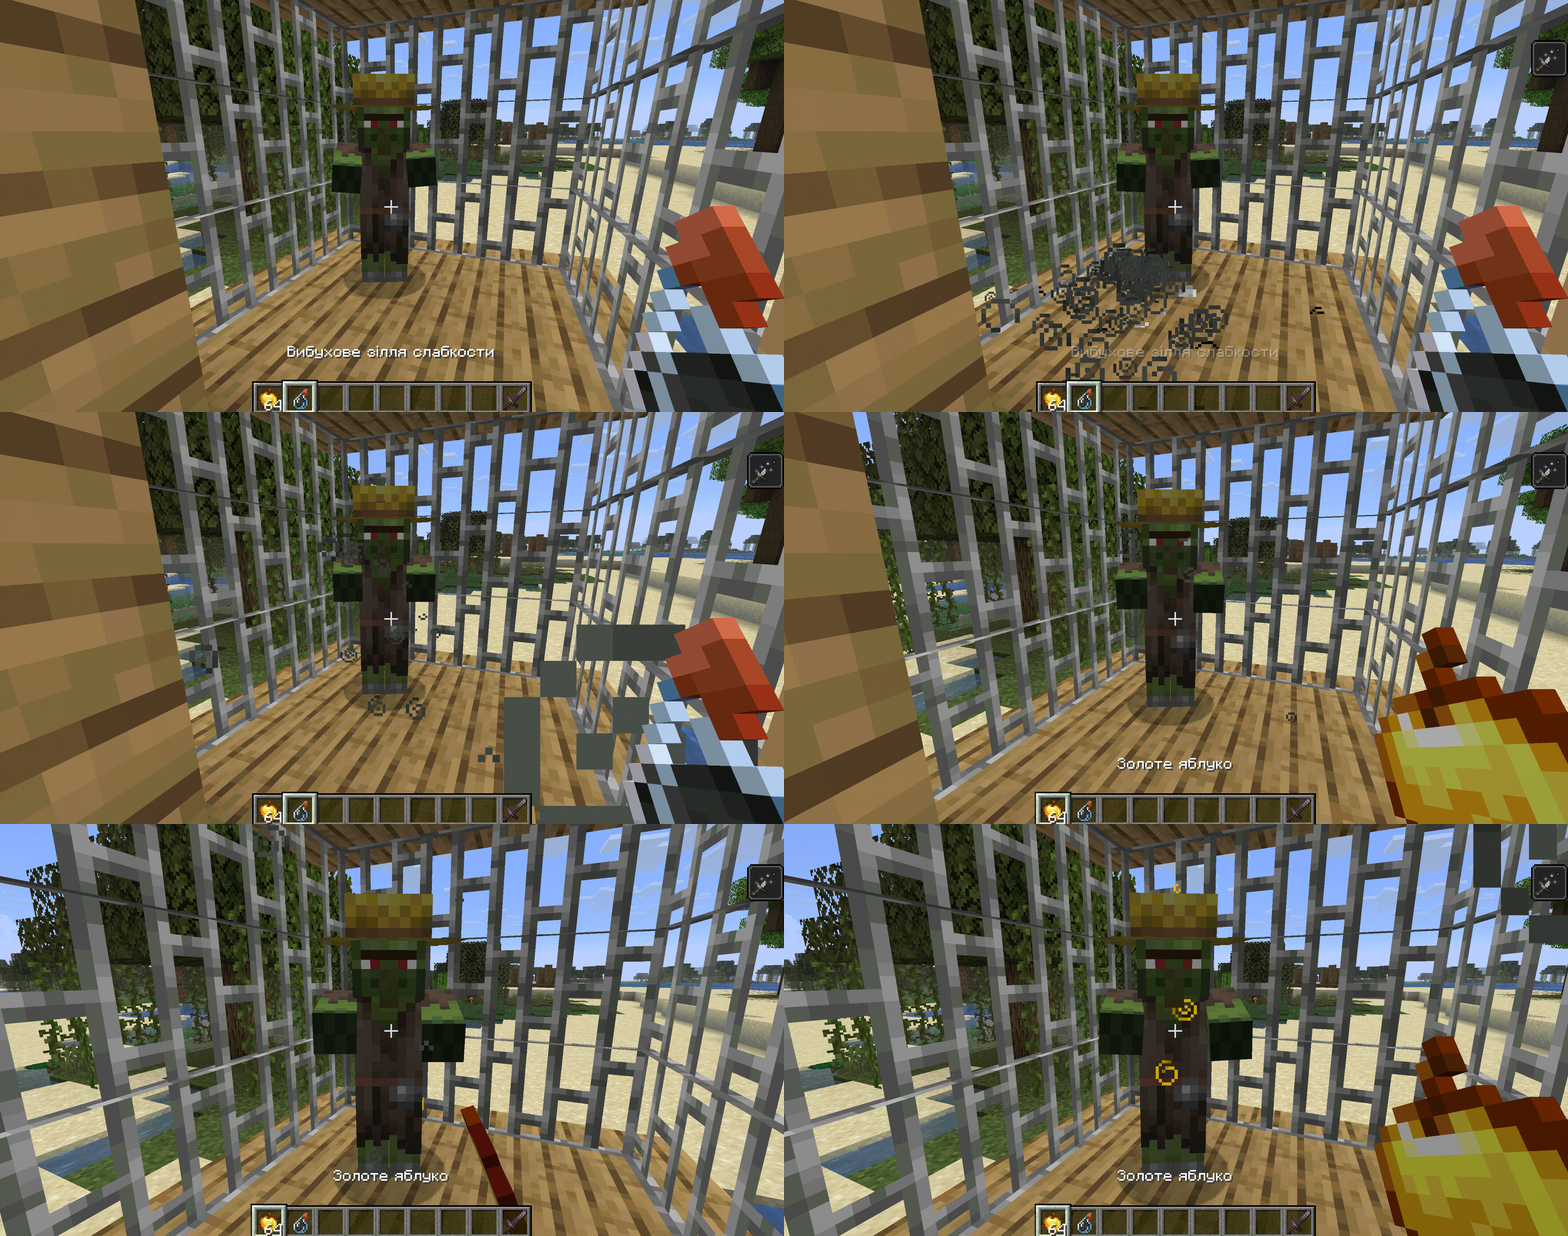
Curing a zombie villager in a cell.
Alternative layouts
The basic 1×2 niche is not the only option. Depending on the space and preference, other approaches can work.
Two-story hall. Villagers aren't bothered by height — cells can be placed in multiple tiers. This saves space in the base. A solid ceiling made of full blocks between tiers is mandatory, otherwise job site blocks from the lower tier might be claimed by villagers from the upper tier — the 48-block radius is a sphere and covers the vertical.
Island hall. In an open area, several beds are placed in the center, surrounded by stands with job site blocks and villagers in separate boxes. Looks decorative, but requires more space.
Yard with minecarts. Villagers sit in minecarts placed directly in front of their job site blocks. Villagers in minecarts don't move or jump out, but can trade and restock perfectly fine. This is a reliable option: zero chance that a villager will lose their block or wander off.
Integrated breeder. A villager breeder is built as a separate room next to the trading hall, with a short corridor for transporting babies. Makes sense if the hall is planned for more than 10 villagers.
Common mistakes and how to avoid them
1. The villager won't trade — red crosses on all offers. The villager was unable to restock. In Java, check: the job site block is there, it's not occupied by another villager, and the villager can walk to it during working hours. In Bedrock, a bed within the village is additionally required. If everything is in place — wait one in-game day and check again.
2. It seems the villager "changed their profession on their own" after you already traded with them. This doesn't happen: after the first trade, the profession is fixed permanently. If the set changed — either the trade never actually happened (you only opened the interface), or another villager claimed the vacant job site block. Double-check by their clothes and the badge on their chest.
3. Iron golems are spawning in the hall and breaking things. An iron golem spawns when a village has ≥10 villagers and ≥20 beds (and working and sleeping conditions are met). While the hall has fewer — there won't be a golem. To avoid golems in a larger hall, keep less than 20 beds or less than 10 villagers within the village radius.
4. A villager from an adjacent niche claimed someone else's job site block. There is a physical path between the niches, or the job site block was placed while a free villager was nearby. Glass and transparent partitions don't block claims — only a solid partition with no path and the correct order helps: first lock the villager, then place the job site block directly in front of them.
5. The villager locked onto the wrong profession. There was another available job site block within 48 blocks. Often, a nearby lectern or a composter in an adjacent village "intercepts" them. Remove any extra job site blocks while securing the desired profession.
6. A relocated villager tries to escape to their old village. The villager remembers their old bed and job site block. As long as there is no available bed in the new location, they will try to head back. Give them a new bed in their cell that they can reach — this will rebind them.
7. The zombie villager died during curing. While being cured, a zombie villager won't despawn even if you walk far away, but they can be killed by other mobs or an iron golem. Cure them under a roof, in a locked cell, away from other zombies and golems. Before curing starts, a zombie villager can despawn if you move away — to prevent this, tag them with a name tag.
On servers and in single-player, villagers "freeze" when they are outside simulation distance — restocking and breeding stop until the chunk is active. Build the hall near your base, within constantly loaded chunks.
Conclusion
A trading hall and villager farm in Minecraft is a long-term investment with a low starting barrier. A basic niche out of a lectern and a few blocks takes minimal space, and one cured Librarian with Mending for 1 emerald pays for all the time spent on construction. Unlike massive decorative halls for all 13 professions, a small hall for 4–6 key villagers can be assembled in an evening and covers most survival needs.
What such a hall doesn't provide is instant results. The Splash Potion of Weakness and Golden Apple for the first cure must be acquired; breeding villagers takes tens of minutes of real gameplay; finding the right Librarian books takes dozens of re-rolling cycles. It's a long game, not a quick farm.
Suitable for: single-player survival after the first few nights, servers with your own base, and late-game play where stable access to Mending, Ender pearls, and diamond gear is required.
Leave a comment
Links will be stripped
No comments yet. Be the first to share your thoughts.