
How to Install Forge in Minecraft: A Step-by-Step Installation Guide
Learn how to manually install Minecraft Forge, set up the required Java environment, and launch your first modded game.
Installing modifications is one of the best ways to diversify gameplay in Minecraft, adding new dimensions, items, mobs, and mechanics. Launching most classic mods requires a special mod loader, the most popular of which is Minecraft Forge. It acts as a bridge between the game's code and third-party developments, preventing conflicts between individual modifications. This guide contains step-by-step instructions for manually installing Forge, setting up the necessary Java environment, and launching the game with mods for the first time.
Preparation
Before starting the installation, make sure your computer is ready. You will need the following resources and tools:
Official Minecraft Launcher: An installed official or alternative launcher with the vanilla version of the game you plan to install Forge on already downloaded (for example, 1.20.1).
Java Package (JRE): The Java version must meet the requirements of the selected Minecraft version.
Forge Installer: The official .jar file downloaded from the developers' website.
Internet Connection: Required to download libraries during installation.
Time: About 10 minutes.
Step 1. Checking and Installing the Correct Java Version
Since Minecraft Forge is based on the Java programming language, installing the correct version of the runtime environment is critical. Different versions of the game require different Java releases.
Java and Minecraft Version Compatibility Table
Minecraft Versions | Required Java Version | Download Link |
1.12.2 and older | Java 8 (JRE 8) | |
1.16.5 – 1.17.1 | Java 16 / Java 17 | |
1.18 – 1.20.4 | Java 17 | |
1.20.5 – 1.21.x | Java 21 | |
26.1 – 26.2 (latest versions) | Java 21 (or newer) |
Download the Java installer for your operating system (Windows, macOS, or Linux), run it, and follow the standard installation steps by clicking the "Next" button.
Step 2. Downloading the Forge Installer
The next step is to obtain the official installation file.
Go to the developers' official website: files.minecraftforge.net.
In the left column, select the desired Minecraft version.
On the download page, you will see two versions: Latest (the newest, may contain bugs) and Recommended (stable, recommended for installation). Click the Installer button under the recommended version.
The site will redirect you to an advertising page (e.g., AdFocus). Do not click on any banners or download offers on this page!
Wait 5 seconds until a red Skip button appears in the top right corner of the screen. Click it to start downloading the original installer file with the .jar extension.

Step 3. Running the Installer and Client Installation
After successfully downloading the installer file, you can proceed to integrate Forge into the game's file system.
Find the downloaded forge-...-installer.jar file in your downloads folder and run it with a double click. If the file opens as an archive or does not respond, make sure you correctly installed Java in the first step.
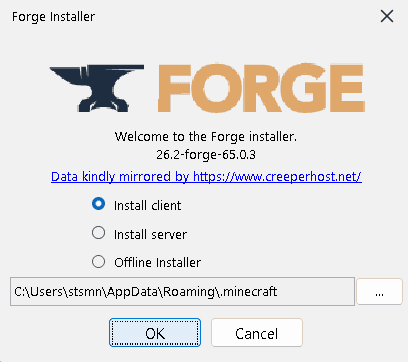
In the installer window that opens, select the Install client option.
Check the path to the game folder at the bottom of the window. By default for Windows, this should be: C:\Users\username\AppData\Roaming\.minecraft
Click the OK button. The installer will begin downloading the necessary libraries and integrating the Forge files. This process can take from 1 to 5 minutes depending on your internet connection speed.
Upon completion, a message about the successful profile installation will appear. Click OK to close the window.
Step 4. First Launch and Profile Activation
Now you need to activate the installed mod loader in the game launcher.
Open the Minecraft Launcher.
In the bottom left corner near the play button, find the profile (version) selection menu.
A new profile named Forge and the game version (for example, 26.2-forge-... or 1.20.1-forge-...) should appear in the list. Select this profile.
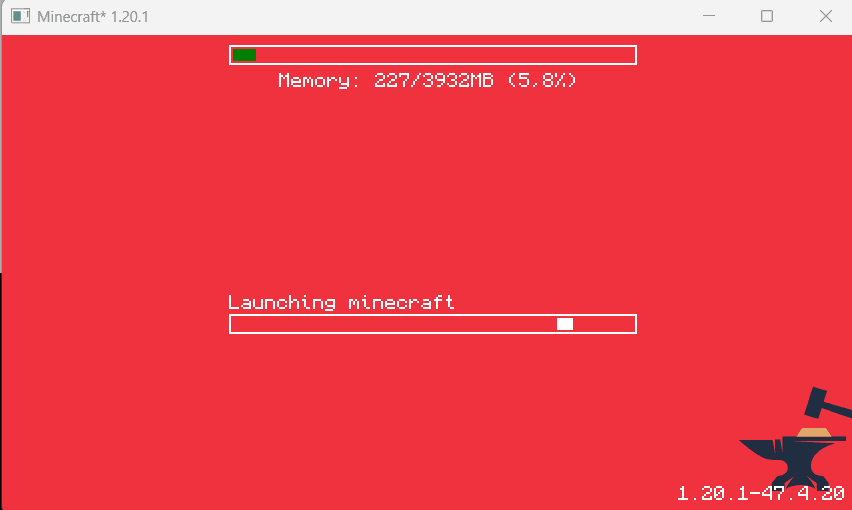
Click the Play button. The launcher may show a warning that this version is modified and does not support some Mojang safety features. Check the agreement box and click "Play".
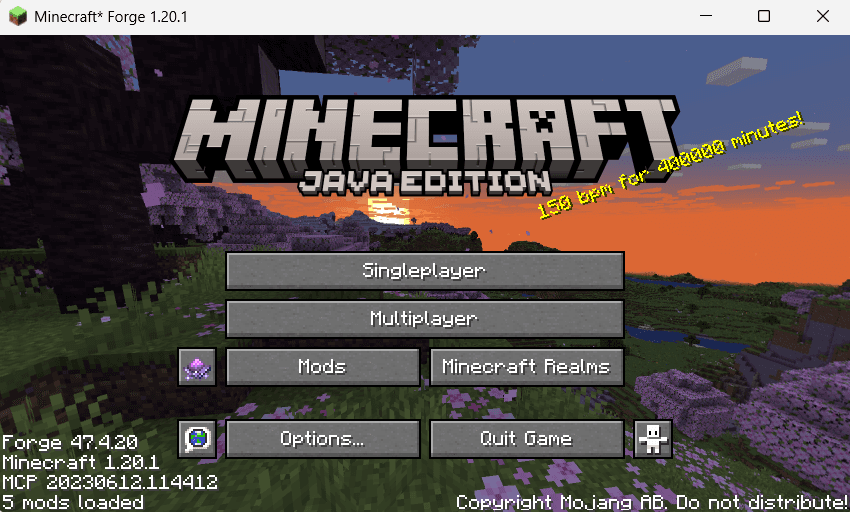
After the game's main menu fully loads, make sure the word "Forge" appears in the bottom left corner of the screen, and a new Mods button has been added to the menu. This confirms a successful installation.
Step 5. Installing Modifications
After setting up the loader, adding new mods is done by simply moving files.
Download any compatible mod for the selected game version in .jar format (for example, from CurseForge websites).
Open the folder with the game files. On Windows, press the Win + R key combination, type %appdata%\.minecraft, and press Enter.
Find the folder named mods in the list. If there is no such folder, create it manually, naming it with lowercase letters.
Move the downloaded mod files into the mods folder.
Restart the game using the Forge profile to activate the modifications.

Possible installation issues:
Mod version conflict: Always check that the versions of the downloaded mods exactly match the version of the installed Forge. If you install a mod for version 1.20.2 on Forge 1.20.1, the game will not start and will throw a crash log error.
Loader conflict: Mods created for the Fabric or Quilt loader will not work on Forge. When attempting to launch, the game will give an incompatibility error. Always look for a mod version specifically designed for Forge.
Issue with .jar file association: If an archiver (like WinRAR) opens when you launch the Forge installer, right-click the file, select "Open with," and choose Java (TM) Platform SE binary. You can also use the Jarfix utility to automatically restore Java file associations.
Alternatives / Variations
If the manual installation process seems too complicated or you want to simplify updating mods, you can use modern alternatives:
Specialized launchers (Prism Launcher, CurseForge App, Modrinth App): These programs have built-in tools that allow you to install Forge, NeoForge, or Fabric in one click when creating a new game profile, completely automating the download of Java and libraries.
NeoForge: A new branch of the Forge loader created by the majority of the original developers for Minecraft versions 1.20.2 and newer, which offers improved stability and compatibility.
Fabric: A lightweight and fast mod loader that provides better game performance, although it has a smaller base of classic large mods compared to Forge.
Conclusion
Manually installing Minecraft Forge is a useful basic skill for any player who wants to deeply customize gameplay to their own needs. This loader remains the standard for using thousands of popular modifications and ensures stable game performance when configured correctly.
However, the manual method requires careful attention when working with Java versions and the system's file structure. For players who do not want to spend time manually transferring files and managing library compatibility, the best solution is to switch to third-party launchers like CurseForge App or Prism Launcher, which automatically handle all the technical work of installing loaders.
Leave a comment
Links will be stripped
No comments yet. Be the first to share your thoughts.