
How to Build a Simple Above-Ground Iron Farm in Minecraft
A complete guide on building a simple, efficient, and easy above-ground iron farm in Minecraft without redstone or aerial platforms.
How to Build a Simple Above-Ground Iron Farm in Minecraft
Iron is always needed. Constantly exploring caves is inefficient. An iron farm solves the problem with a one-time build: villagers panic from seeing a zombie, call for an iron golem's help every few dozen seconds, and the player collects iron ingots and poppies from it.
This guide describes a simple above-ground version of the farm — without floating platforms, without redstone, built on a flat area. The villagers and zombie are hidden in a short underground tunnel, while the spawning arena is built directly on the grass above them.
How It Works
Villagers see a zombie through open trapdoors and start to panic. When three villagers panic simultaneously, the game attempts to spawn an iron golem in an area around them every 5 seconds. The golem spawns on the grass within a stone wall enclosure above the underground chamber. A stream of water pushes it into a corner filled with lava, where the golem dies. The drops flow with the water into hoppers leading to a chest.
What You Will Need
Material | Quantity | Purpose |
Stone Wall | 24 pcs. | 7×7 enclosure above the underground chamber |
Trapdoor | 11 pcs. | Chamber ceiling and window between villagers and the zombie |
Hopper | 3 pcs. | Drop collection |
Bed | 3 pcs. | One for each villager |
Shovel | 1 pc. | Converting grass to dirt paths |
Boat | 1 pc. | Keeping the zombie in place |
Water Bucket | 1 pc. | Water flow towards the lava |
Lava Bucket | 1 pc. | Kill chamber |
Chest | 1 pc. | Storage |
Any block | 1 pc. | Support for the water source in the corner |
Name Tag (optional) | 4 pcs. | Prevents the zombie and villagers from despawning |
Choosing a Location
You need to build this on a flat area without hills or mountain slopes nearby. The surface should be regular grass (later you will make dirt paths with a shovel). There must be no other villages or villager farms within an 80-block radius — otherwise, the villages merge into one, and the center shifts.
Step 1. Underground Chamber for Villagers and Zombie
First, you need to sink the villagers and the zombie below ground level so that a clear spawning field remains above them.
Dig a hole 3×2 blocks wide and 3 blocks deep. This is the initial entrance.
Standing in the hole, continue the tunnel forward by breaking 12 blocks ahead of you — this is the full length of the underground room.
At the far end of the tunnel, make a small staircase so the zombie can walk down into it.
Inside the room:
At the intersection between the zombie's section and the villagers' section, place 3 trapdoors in a row — this is the partition wall that will be opened at the end.
In the zombie's section, place a boat — the hostile mob will sit in it and won't be able to move.
In the villagers' section, place 3 beds next to the trapdoor partition.
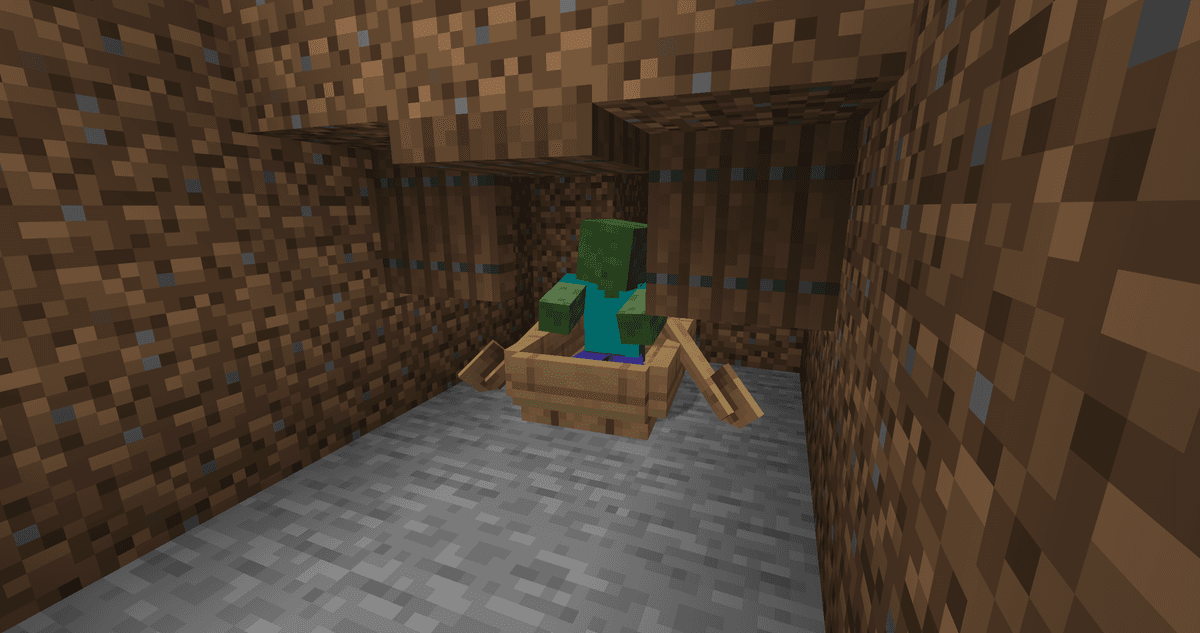
Underground chamber: a tunnel 3 blocks deep and 12 blocks long, a boat for the zombie at the far end, separated by three trapdoors in the middle
Step 2. Chamber Ceiling and Above-Ground Wall
When the underground section is ready, it must be covered up and the surface prepared for spawning.
Cover the entrance opening to the shaft with slabs. A slab does not let mobs through and does not serve as a spawnable surface, preventing unwanted mob spawns.
At ground level above the chamber, place a 7×7 stone wall enclosure. This forms the boundary for the future arena. A one-block-high wall is enough — the golem cannot jump over it or escape.
The enclosure must absolutely be made of stone walls, not solid blocks. Walls connect to each other and prevent mobs from slipping through, while simultaneously not counting as a spawn block where a golem could accidentally spawn out of place.
Step 3. Water Flow and Kill Chamber
Now, you need to arrange the water flow inside the arena to push the golem into one corner.
On one corner of the wall enclosure, place any block one block high (a support block above the wall level).
On this block, pour water from a bucket — the stream will flow down and spread across the arena towards the opposite corner.
In the opposite corner of the wall, pour lava from a bucket. The lava will stay in that corner — the water reaches the lava but does not wash it away.
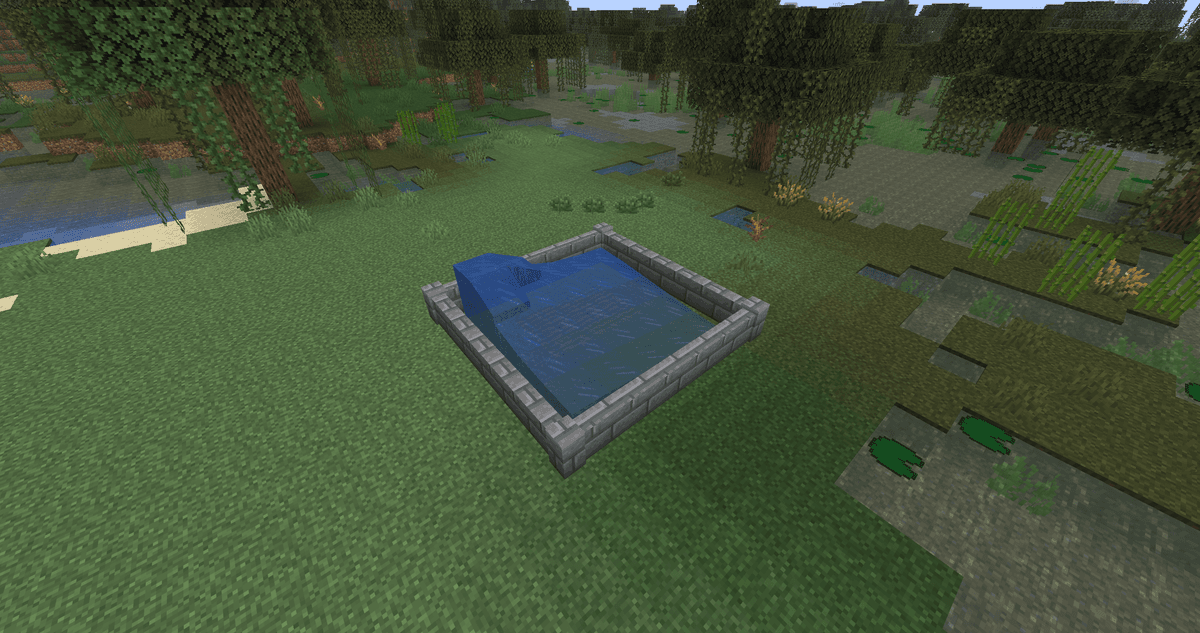
Water flow pushing the mob into the corner
The golem will spawn somewhere in the middle of the arena, and the water will immediately push it towards the lava corner, where it dies.
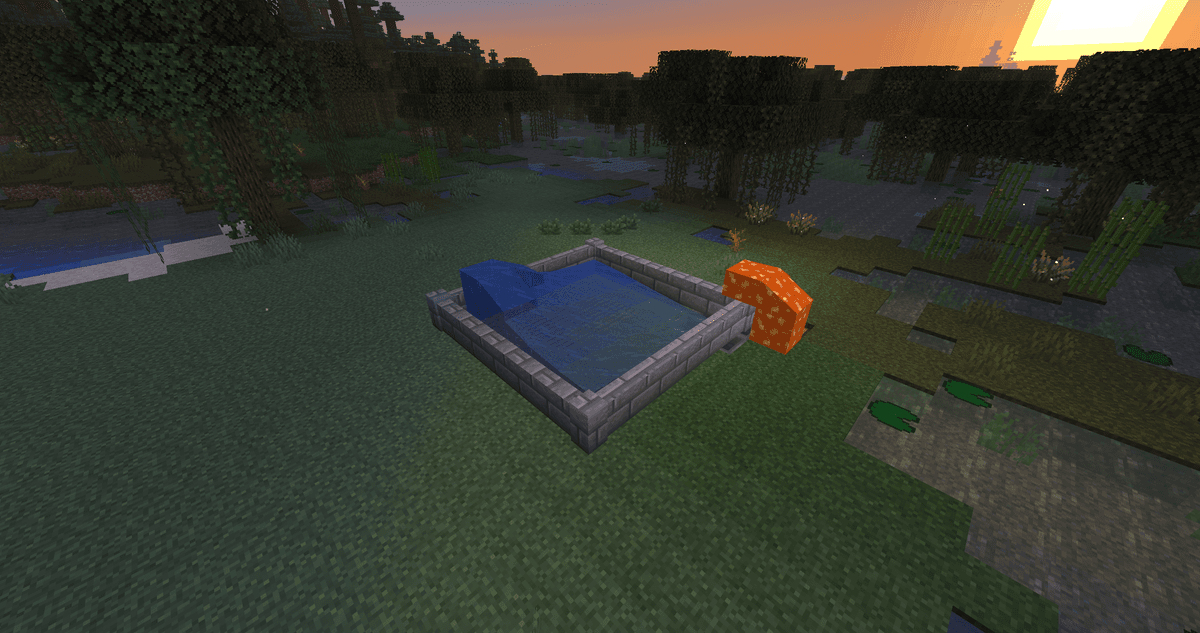
Overall construction of the arena from the side with lava and water
Step 4. Drop Collection
On the side where the lava is located, before placing the lava, you should set up the collection system.
Outside the wall near the lava corner, dig a small hole. Place a chest inside it.
In front of the chest, place hoppers in a chain, so the last one points into the chest. The hoppers will catch the drops flowing with the water towards the lava and transfer them into the chest.
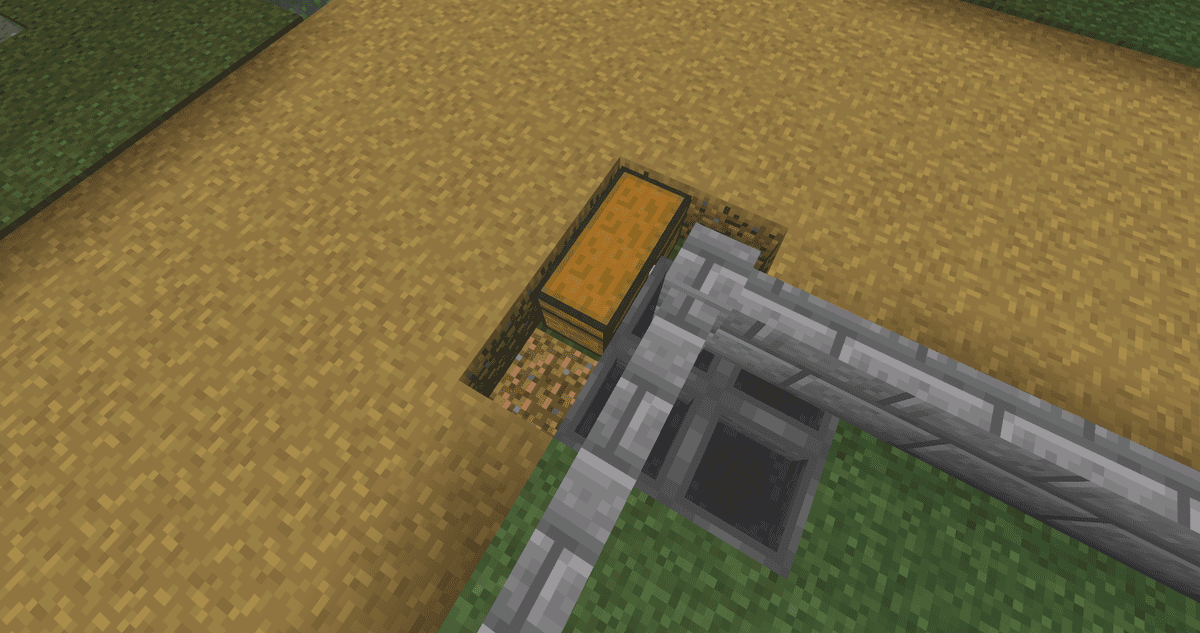
Drop collection mechanism
Step 5. Blocking Spawns Around the Farm
If regular grass remains around the arena, a golem could spawn outside the enclosure — resulting in a loss of efficiency.
This problem is solved using a shovel. Use the shovel to dig a 6-block-wide perimeter around the wall enclosure — the grass blocks will turn into dirt paths. Mobs do not spawn on dirt paths because their top surface is slightly lower than a full block.
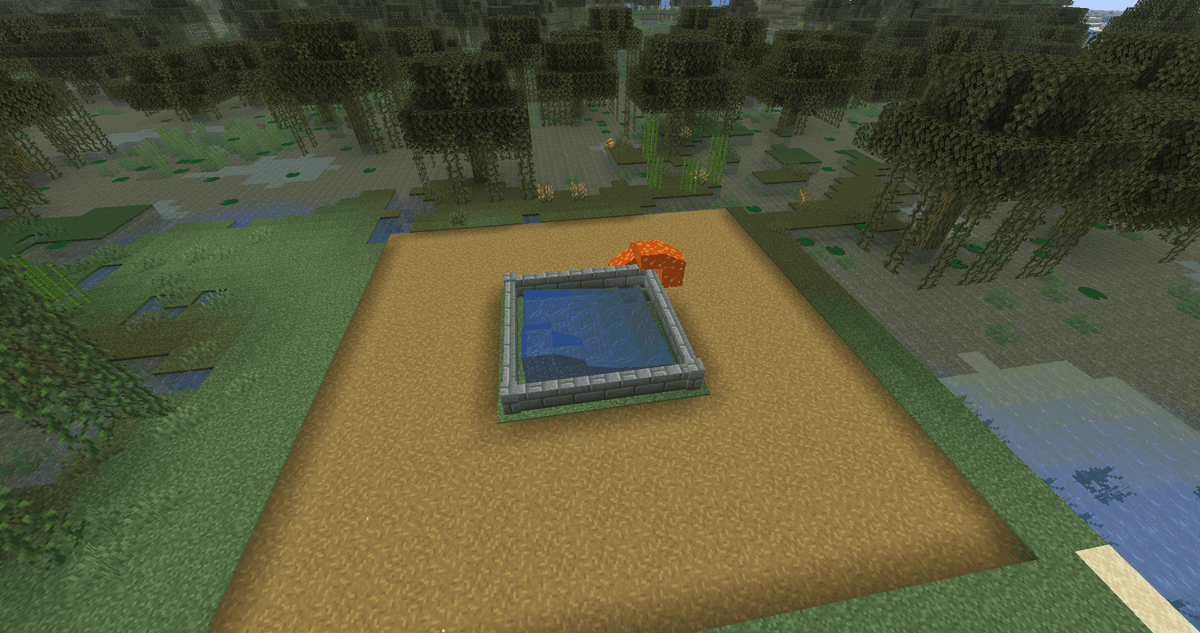
Top-down view of the fully completed structure
Step 6. Starting the Farm
Lead the villagers and the zombie into the underground chamber through temporary holes in the ceiling or via the entrance shaft before closing it up. Place the zombie into the boat at the far end of the tunnel, and the villagers in the section with the beds.
The final step is to open the trapdoors on the partition between the zombie and the villagers. Up to this point, the villagers couldn't see the zombie and acted calmly. As soon as the trapdoors are opened, visual contact is made — the villagers begin to panic, and the farm starts working.
Common Mistakes
Villagers are not panicking. The trapdoors on the partition are closed, or there is a solid block between the villagers and the zombie instead of trapdoors. Check that all three trapdoors are open and there are no blocks between them.
The golem spawns, but not inside the arena. Grass blocks were left within the radius around the enclosure and were not shoveled into dirt paths. Ensure that a complete ring of dirt paths is formed, without any gaps.
The golem doesn't reach the lava. The water flow doesn't cover the entire arena — the source was placed on the side instead of the corner block. Check that the support block is exactly in the corner and the water spreads diagonally 7-8 blocks to the opposite corner.
The zombie disappeared. Without a name tag, a zombie can despawn when the chunk unloads. Apply a name tag to it, after renaming it on an anvil.
Drops don't reach the chest. The hoppers are pointed in the wrong direction. You need to place each hopper by crouching and looking toward the next one (or toward the chest for the last one).
Conclusion
This iron farm solves the player's constant need for iron during Minecraft survival. The design doesn't require redstone, floating platforms in the sky, or complex height calculations — all spawning and collection occur directly at ground level.
Limitations: the farm only works while the chunks it's in are loaded, meaning within simulation distance from the player (default 4 chunks ≈ 64 blocks). If you walk farther away, spawning stops until you return. Collection speed depends on the amount of time the player spends nearby.
This design is ideal for single-player survival and small servers. It is worth building in the early stages of the game, as the materials are basic, and the completed farm eliminates the need to manually mine for iron.
Leave a comment
Links will be stripped
No comments yet. Be the first to share your thoughts.