
How to make a banner in Minecraft: patterns and design
A step-by-step guide to creating a banner in Minecraft Java Edition. All patterns, loom, rare banner patterns from Trial Chambers, map…
A banner is a decorative block on which up to 6 patterns of any colors can be applied. It is used to decorate bases and villages, as a marker on a map, as a shield overlay, and as a guild identifier on a server. In vanilla, 16 base colors and 38 different patterns are available — some are made directly through a loom, while others require special banner pattern items from rare structures.
Preparation
For a basic banner without patterns, a single crafting table is enough. To apply a design, a Loom is needed — it replaces the complex banner crafting recipes that were removed in 1.14.
Item | Quantity | Note |
|---|---|---|
| 6 | Any color. The color determines the base color of the banner. |
| 1 | Standard craft from 2× |
| 1 | Crafted from 2× |
| 1+ per pattern | The color of each pattern layer. |
A standard banner has a 16-block height (1 block with a full hitbox + 1 banner block with a reduced hitbox). It can be placed on the ground, on a wall, and on a ceiling — the model rotates automatically.
Step 1. Creating a basic banner
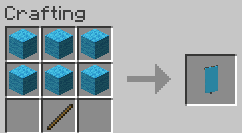
Place 6 pieces of wool of the same color in the top two rows of a crafting table and 1 stick in the center of the bottom row.
Slot | Item |
|---|---|
1, 2, 3 |
|
4, 5, 6 |
|
8 |
|
The result is a Banner in the color of the wool. The banner does not melt, does not burn in lava (it burns in fire from flint and steel — disappears in ~10 seconds), and is not damaged by TNT explosions from a distance of more than 4 blocks.
Step 2. Working with the loom
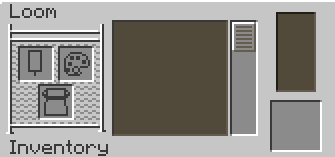
The Loom interface has three input slots and one output slot:
Top left —
Banner.Bottom left —
Dye(color of the new layer).Right — optional slot for a
Banner Pattern(rare patterns that cannot be selected in the list).Central list — 16 basic patterns that are immediately visible.
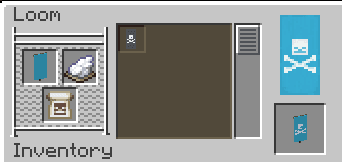
When selecting a pattern in the list, a preview appears on the right. After taking the result from the output slot, the dye and the pattern are consumed (though banner pattern items are not consumed) — the banner is returned with a new layer on top of the previous ones.
Limitation — 6 pattern layers. Attempting to add a 7th layer through the loom will yield no result. Using /give can bypass the limit, but such a banner does not stack in a normal inventory and breaks rendering on older GPUs.
Step 3. Basic patterns (without pattern items)
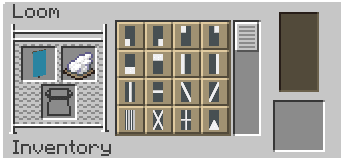
These 16 patterns are available right away — only a banner and a dye are needed.
Category | Pattern Names |
|---|---|
Stripes | Vertical stripe, horizontal stripe, diagonal (4 orientation variants) |
Halves | Top, bottom, left, right half |
Quarters | Top left, top right, bottom left, bottom right quadrant |
Border | Bordure, frame along the edge |
Geometry | Cross on the diagonals (saltire), straight cross (plus) |
Center | Small rhombus, large rhombus, circle, roundel |
For complex-shaped banners (a country flag, heraldic symbol, minimalist logo), combine patterns in order from general to specific: first the background, then large shapes, and small accents at the end. Each new layer partially covers the previous ones.
Step 4. Patterns that require a pattern item
Six patterns do not appear in the list — they require a separate item in the right slot.
Pattern | Pattern Item / Source | How to obtain |
|---|---|---|
Creeper Charge |
| Drops from a creeper killed by a charged creeper |
Skull Charge |
| 2.5% drop from a wither skeleton (without Looting) |
Flower Charge |
| Natural flower in plains biomes |
Field Masoned |
| Crafted from fired bricks or mason villager trade |
Bordure Indented |
| Jungles, swamps, caves |
Thing (Mojang Symbol) |
| Crafted with an |
Banner pattern items are not consumed in the right slot — they can be used endlessly. Only the dye is consumed.
Rare patterns from new structures
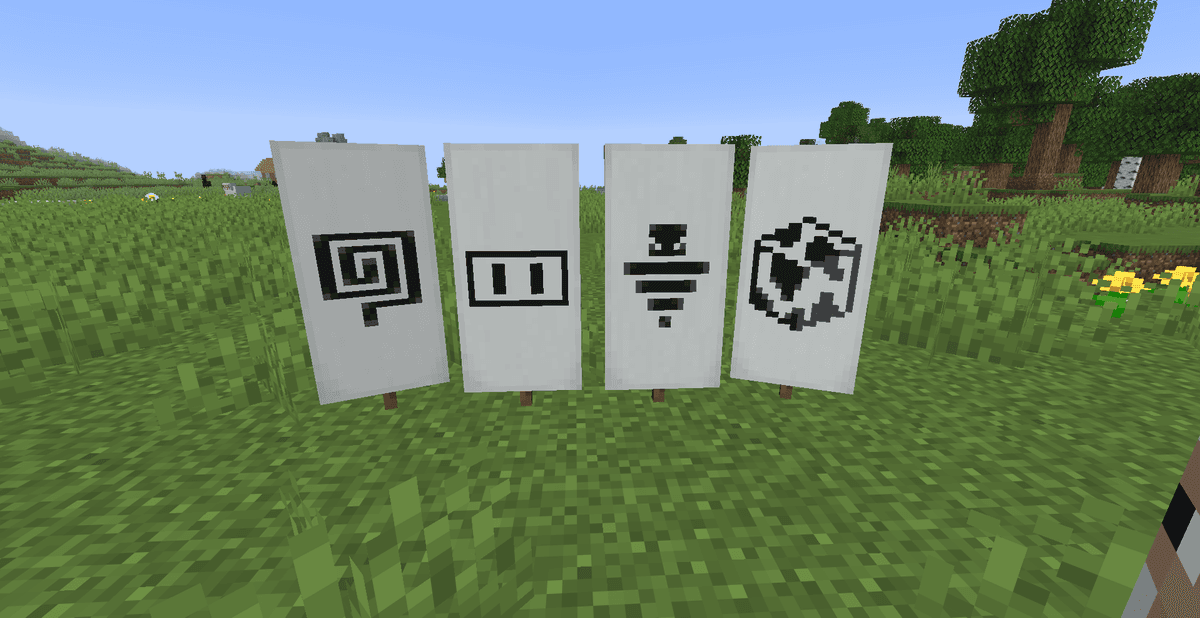
Since 1.20 and 1.21, three patterns have been added that can only be obtained in special structures.
Pattern | Pattern Item | Structure |
|---|---|---|
Snout |
| Chests in Bastion Remnants in the Nether |
Globe |
| Trade with a master-level cartographer |
Flow |
| Ominous Vault in Trial Chambers |
Guster |
| Ominous Vault in Trial Chambers |
Flow and Guster patterns drop only from an Ominous Trial Key, which is given by an Ominous Trial Spawner. To activate it, an Ominous Bottle (from raids) is needed. A regular vault does not give these patterns.
Step 5. Copying a banner
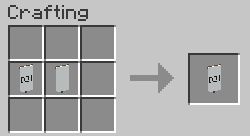
If you want to make several identical banners, do not repeat all 6 layers manually. Place the finished banner in a crafting table together with a blank banner of the same color:
1 finished banner with a design (in the center).
1 blank banner of the same base color (next to it).
The result is two identical banners. This makes crafting sets for a guild or villages much faster.
Step 6. Applying banners
A Banner is used far beyond decoration:
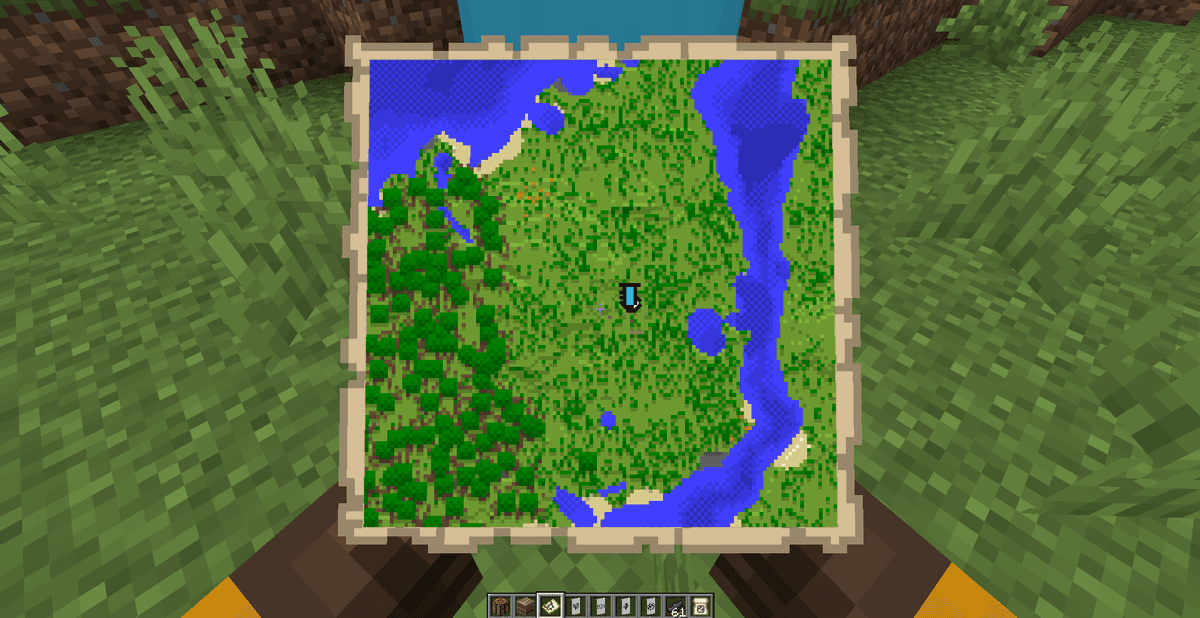
Map marker. Place a banner in the world, hold a
Mapin your hand, right-click on the banner — a colored marker with a name you can set via anAnvilwill appear at that location on the map. The marker disappears if the banner is destroyed.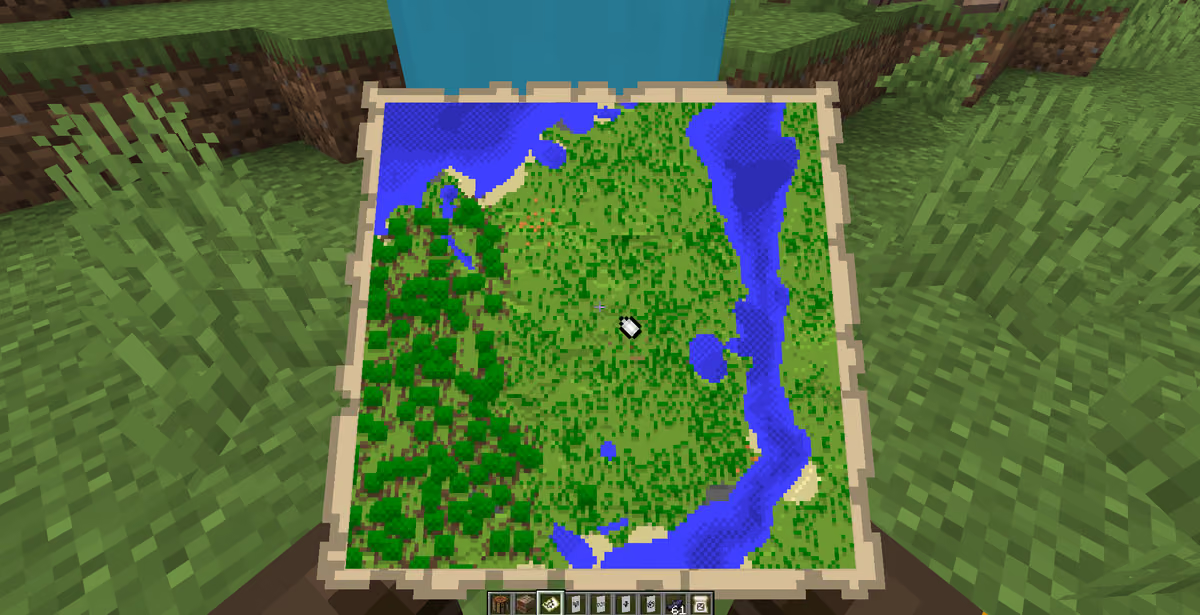
Shield overlay. Place a
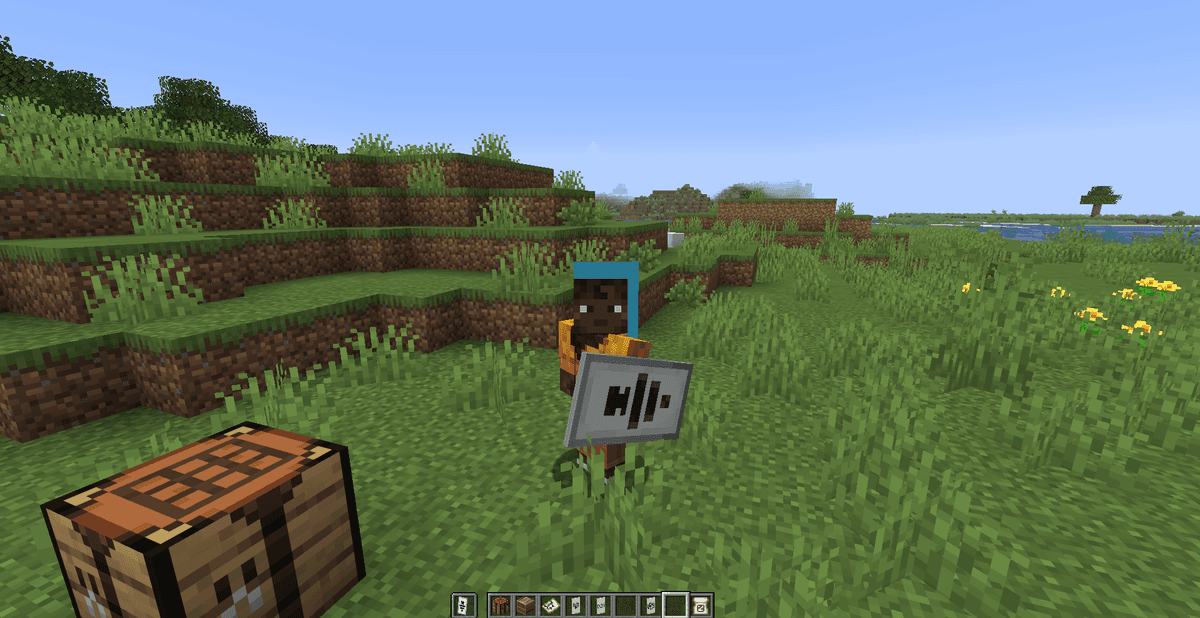
Shield+Bannerin a crafting table (shield in the left slot, banner in the right). The design is copied to the shield, and the banner is consumed. It can only be washed off with aCauldronwith water.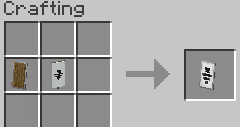
Village decor. Generated banners in villages define the profession of the villager nearby (
Shepherd— a white-and-gray banner).
A maximum of 6 layers are displayed on a shield, but shields have a smaller render hitbox — fine details of the pattern (cross ends, thin edge stripes) may blend together. It's better to use 2–3 contrasting layers for a shield.
Common Mistakes
Trying to dye a finished banner instead of adding a layer. Dye in a crafting table together with a banner will not change it — a loom is needed.
Mismatch between wool and dye colors. You can make a red banner with layers of a blue pattern, but you cannot "repaint" the base — for this, you need a new banner made of wool of the desired color.
Inventory clogs up with patterns. Banner pattern items do not stack — each takes up a separate slot. Place them in a sorting
Chest, because they will take up a lot of space in the inventory.The banner disappeared after being carried. A banner is saved as an intact item with NBT tags. When testing on a server without
keepInventory, after death, the NBT is not lost — pick up the banner from the drop, do not craft it again.
Conclusion
A basic banner without patterns is made in 30 seconds, but a full 6-layer design means 6 separate cycles through a loom and a set of dyes. An alternative to manual work is a banner generator in the browser (e.g., planetminecraft.com/banner-creator) — it provides a ready-made sequence of layers based on an image, and you just have to repeat it in the game.
For server PvP teams and guilds, the optimal template is 2 background layers + 1 symbol layer (e.g., skull or flower) and copying via a crafting table. For decorative banners in buildings, it makes sense to craft all 6 layers at once — from a distance, only the overall composition is visible; fine details are legible within 3–4 blocks.
Leave a comment
Links will be stripped
No comments yet. Be the first to share your thoughts.