
How to Build a Wither Skeleton Skull Farm in Minecraft
Builds a Nether Fortress farm that teleports Wither Skeletons via linked portals to a kill chamber using an Iron Golem lure. Skulls drop at…
How to Build a Wither Skeleton Skull Farm in Minecraft
A Wither Skeleton skull farm is a structure in a Nether Fortress that gathers Wither Skeletons from a large area into a single chamber, where the player finishes them off manually. The skull only drops 2.5% of the time (5.5% with Looting III), so you have to kill dozens of mobs to get three skulls to summon the Wither. This farm speeds up the process: the mobs teleport themselves to the kill chamber through portals, and the player only has to deliver the final blow.
How the farm works
Wither Skeletons spawn only within the bounds of a Nether Fortress, on Nether Bricks, at light levels 0–7, in groups of up to four. A large Nether Brick platform inside the fortress forces them to spawn exactly on it. An Iron Golem stands in the center — Wither Skeletons run towards it because they attack golems. A portal stands in their way: touching it, the mob teleports in a few seconds to a linked portal above the Nether roof and falls into the kill chamber. The skull drops only when killed by a player, so you have to finish the mobs yourself.
What you will need
Material | Quantity |
Nether Bricks | 896 |
Walls (Nether Brick) | 130 |
Glass | 88 |
Obsidian | 58 |
Slabs | 49 |
Repeater | 12 |
Ladder | 4 |
Stairs | 4 |
Trapdoor | 2 |
Chest | 4 |
Hopper | 2 |
Iron Golem | 1 (4 iron blocks + carved pumpkin) |
Door | 1 |
Ender Pearl | 1 |
Iron Bars | 3 |
Cobweb | 3 |
Temporary blocks | many |
Versions: tested on Minecraft 1.21. The method works on versions with access to the Nether roof and standard portal linking.
The skull will not drop from an automatic kill. Take a Looting III sword and have milk or golden apples ready — a Wither Skeleton's hit inflicts the Wither effect.
Step 1. Finding a fortress and marking
Find a fortress above a Soul Sand Valley or in a Warped Forest — there are fewer outer spawns in these biomes, so the farm will catch more mobs. Climb to the highest brick block in the fortress, press F3, take the Y coordinate, subtract 2, and remember the resulting number — this is the exact level where the platform will be built. Next, press F3+G to turn on chunk borders, find a chunk corner inside the fortress, and build your way to it. The entire farm is built of Nether Bricks.
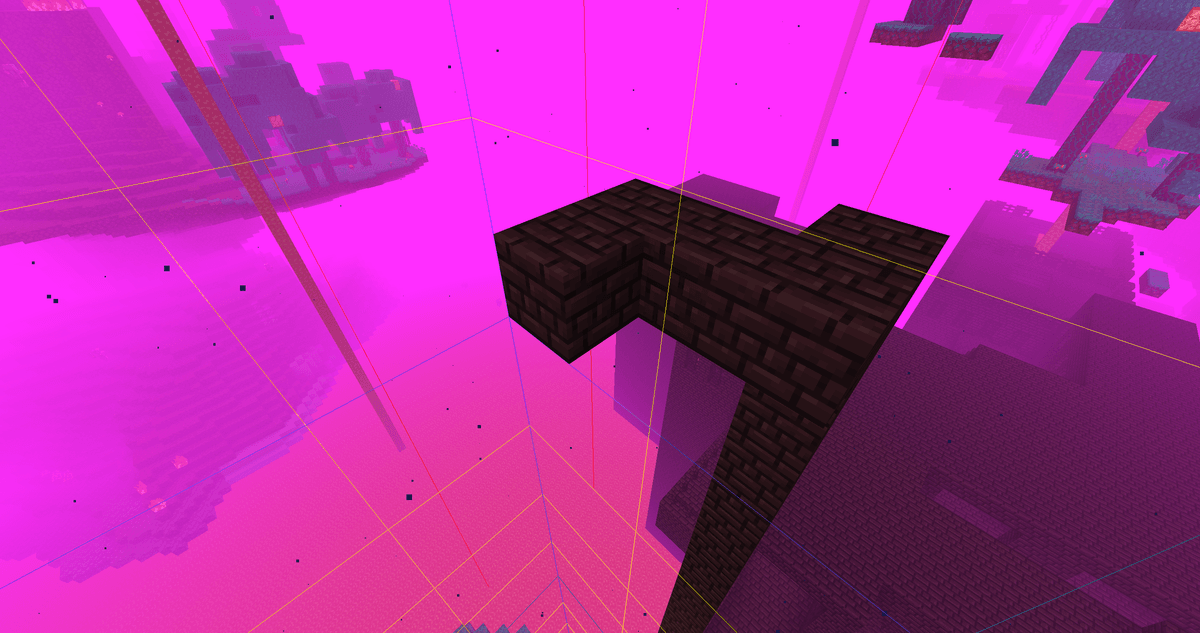
Brick blocks on chunk borders
Step 2. Platform and bait
At the memorized Y level, place 2 double chests so that they intersect all 4 chunks at the corner. From the chests, build out 14 blocks in each direction and connect everything into a solid platform. Along the edge, place a wall with a 1-block gap, and then fill the rest of the platform with walls every 2 blocks. Standing on the chest, use F3 to make sure you are facing south: place 1 temporary block in this direction, place walls on the other three sides, and then break the temporary block — the south side remains open. On top of the walls and chests, lay out a 4×4 square and assemble an Iron Golem inside from 4 iron blocks and a carved pumpkin. Place iron bars on the east and north sides of the square so the mobs can see the golem and run towards it. Finally, place 12 repeaters on the line of the square, and cover the golem and repeaters on top with a roof of slabs.
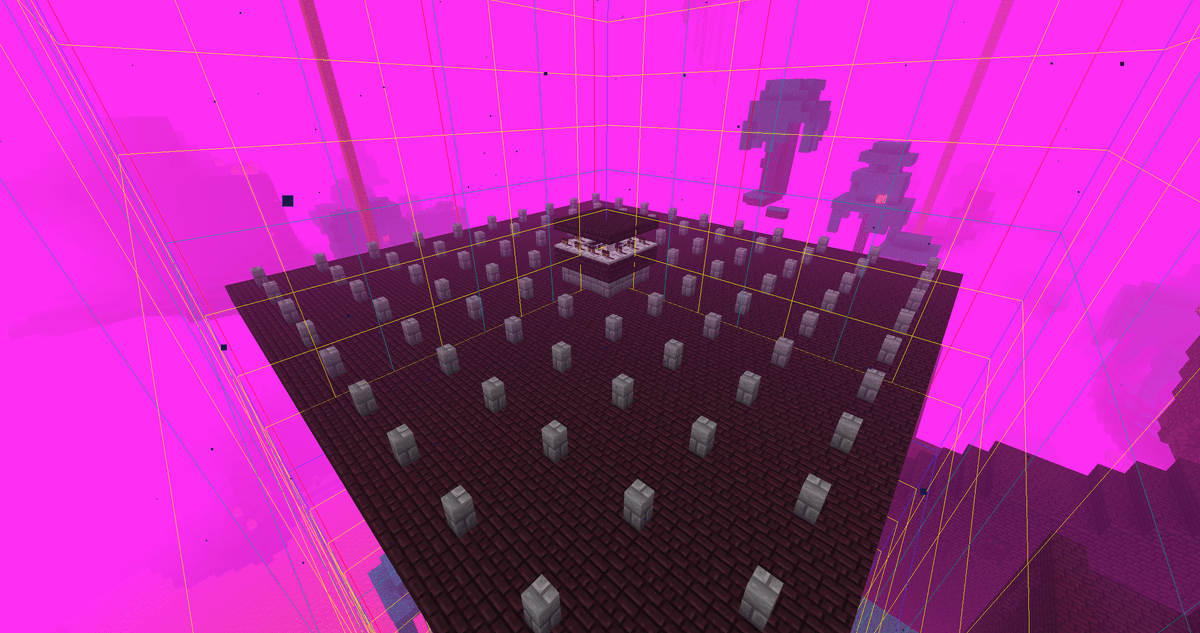
Nether Brick platform with walls laid out every 2 blocks and a 4×4 cube in the center
Step 3. The first portal in the fortress
Approach the open south side and fill in the rest of the walls. Build 4 obsidian blocks wide, place stairs next to them, and 2 slabs on the side. Around the square, from one piece of obsidian to another, place walls, and place slabs on these walls 1 block away from the obsidian. Add 3 obsidian blocks on both sides to continue the portal frame, place slabs on the ends to prevent mob spawning, and connect the obsidian on top, covering it with slabs as well. Step inside the unlit portal, memorize the coordinates, and light it — but do not step through it, this is crucial.
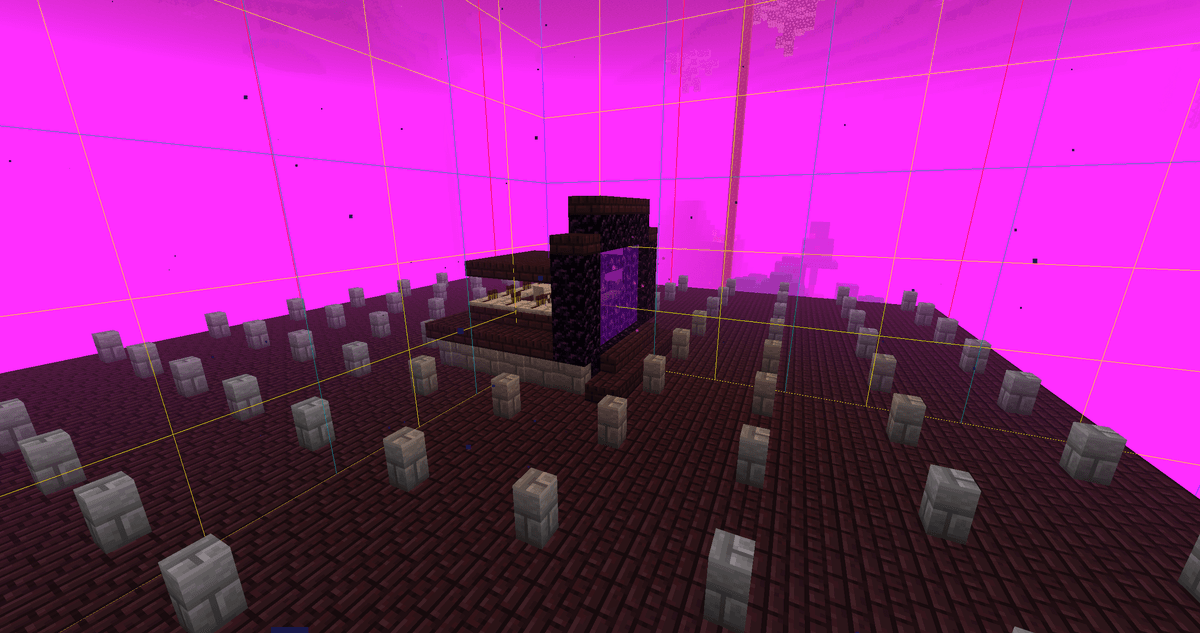
Finished obsidian portal frame inside the fortress, next to the golem chamber
Step 4. Kill chamber on the Nether roof
Make your way to the very top of the Nether so that the target bedrock coordinate is 127, climb the ladder, and throw an Ender Pearl at the ceiling — this is how you get on top. Run to the coordinates you memorized in the previous step, take their Y, add 126, and build up to this level. Turn on chunk borders again with F3+G, place one glass block in each chunk, and expand the platform by 2 blocks in each direction. Return to the working Y, build 4 blocks up and 2 to the side, and make a portal from the last block, not forgetting the slabs against spawning; close the outer side of the portal from the platform with 1-block deep blocks. Place 2 blocks under the portal, 2 trapdoors on them, and 2 slabs on top — mobs will fall there, and this will be the kill chamber. Place ladders if you need to go up, and place hoppers leading into a chest under the chamber for storage.
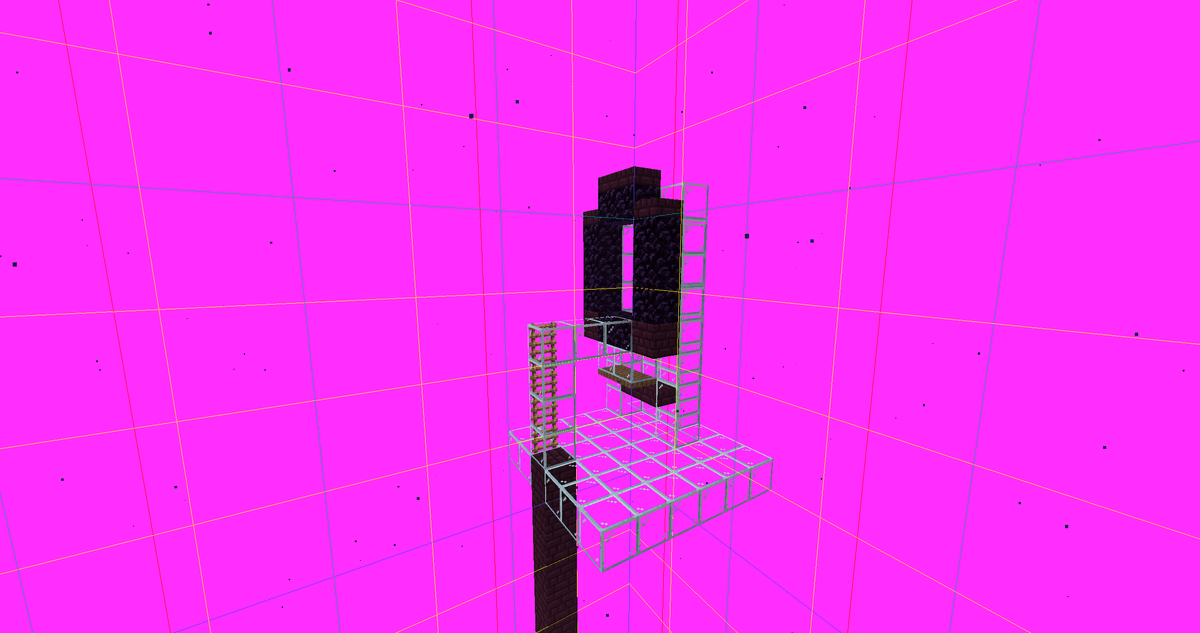
Kill chamber built of glass
Step 5. Linking the portals
Return to the working Y, build 19 blocks in the opposite direction from the portal, and place another portal with anti-spawn slabs at the end. Now return to the first portal, step into it, and place a door so that it is on the front part of the block, and a wall next to it; standing in the portal, memorize the coordinates for the last time, light the portal, and step through. Once on the other side, break the portal, walk to your coordinates, and recalculate them: multiply X by 8, subtract 1 from Y, multiply Z by 8. Reaching the new coordinates, face south, build 10 blocks, and make a 3×3 portal at the end; then go back along the line and make another 3×3 portal on the last block — one should end up higher than the other. Expand the bridge to 3 blocks and place 2 strips of blocks so the mobs don't fall off, then place 3 slabs near the upper portal and activate it. Return to the lower portal, lay out a line of block — wall — block behind it, step into the portal, place 3 cobwebs nearby, activate it, and step in. All that's left is to close the door and activate the other portal — the farm is ready.
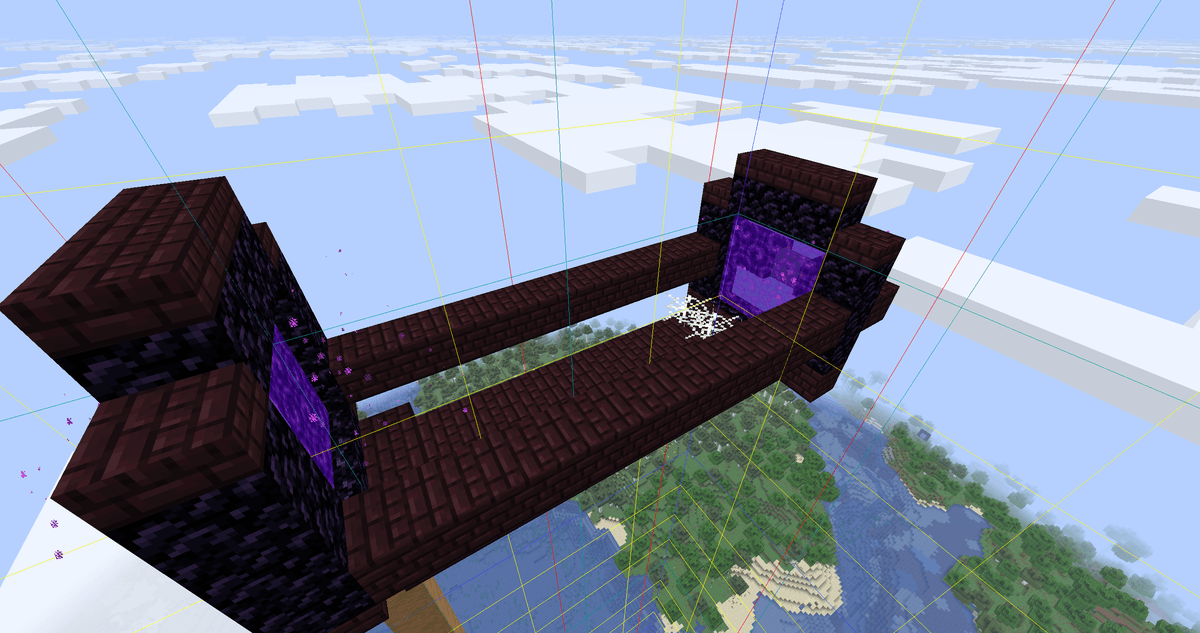
Two identical 3×3 portals on a bridge, connected to the rest of the structure
Technical details: portal coordinates
Portal linking relies on the ratio of the worlds: 1 block in the Nether corresponds to 8 blocks in the Overworld. That is why X and Z are multiplied by 8 — this way each new portal links to the correct frame instead of creating its own in a random place. If the coordinates are off by even a few blocks, the chain breaks and the mobs don't reach the chamber. Check X, Y, Z via F3 on each portal individually.
Common mistakes
Going through the first portal in Step 3. If you go through, the game will link it to a random frame on the other side, and mob teleportation will break. The portal is only lit.
Inaccurate coordinates when multiplying by 8. An error of even 2–3 blocks leads to mobs exiting past the chamber. Check the coordinates via F3 before each frame.
Missing slabs on frame ends and bridges. Without them, Wither Skeletons spawn right on the portals and bridge, fill up the mob cap, and don't reach the bait.
Trying to turn on chunk borders with F3+D. Chunks are shown exactly by F3+G; F3+D only clears the chat.
Automatic killing. The skull only drops from a player kill, so the chamber cannot be closed with lava or another auto-killer.
Conclusion
A Wither Skeleton skull farm allows you to quickly gather skulls to summon the Wither without running around the fortress manually. The main limitation of the method: the final blow is dealt by the player, so the structure will not be fully automatic, and coordinate precision when linking portals is critical. It is suitable for those playing in survival who want a stable source of skulls and coal in Minecraft without mods — provided you are ready to carefully track Y and chunk borders during construction.
Leave a comment
Links will be stripped
No comments yet. Be the first to share your thoughts.